Tag Archives: real-time

Analytical Instruments You Need to Start a Cannabis Testing Laboratory

By Bob Clifford
8 Comments

The cannabis industry is growing exponentially, and the use of cannabis for medical purposes is being adopted across the nation. With this boom in cannabis consumers, there has been an increasing need for knowledge about the product.

The role of testing labs has become crucial to the process, which makes owning and operating a lab more lucrative. Scientists testing for potency, heavy metals, pesticides, residual solvents, moisture, terpene profile, microbial and fungal growth, and mycotoxins/aflatoxins are able to make meaningful contributions to the medical industry by making sure products are safe, while simultaneously generating profits and a return on investment.

Here are the key testing instruments you need to conduct these critical analyses. Note that cannabis analytical testing requirements may vary by state, so be sure to check the regulations applicable to the location of your laboratory.

Potency Testing

High-performance liquid chromatograph (HPLC) designed for quantitative determination of cannabinoid content.

The most important component of cannabis testing is the analysis of cannabinoid profiles, also known as potency. Cannabis plants naturally produce cannabinoids that determine the overall effect and strength of the cultivar, which is also referred to as the strain. There are many different cannabinoids that all have distinct medicinal effects. However, most states only require testing and reporting for the dry weight percentages of delta-9-tetrahydrocannabinol (Δ9-THC) and cannabidiol (CBD). It should be noted that delta-9-tetrahydrocannabinolic acid (Δ9-THCA) can be converted to THC through oxidation with heat or light.

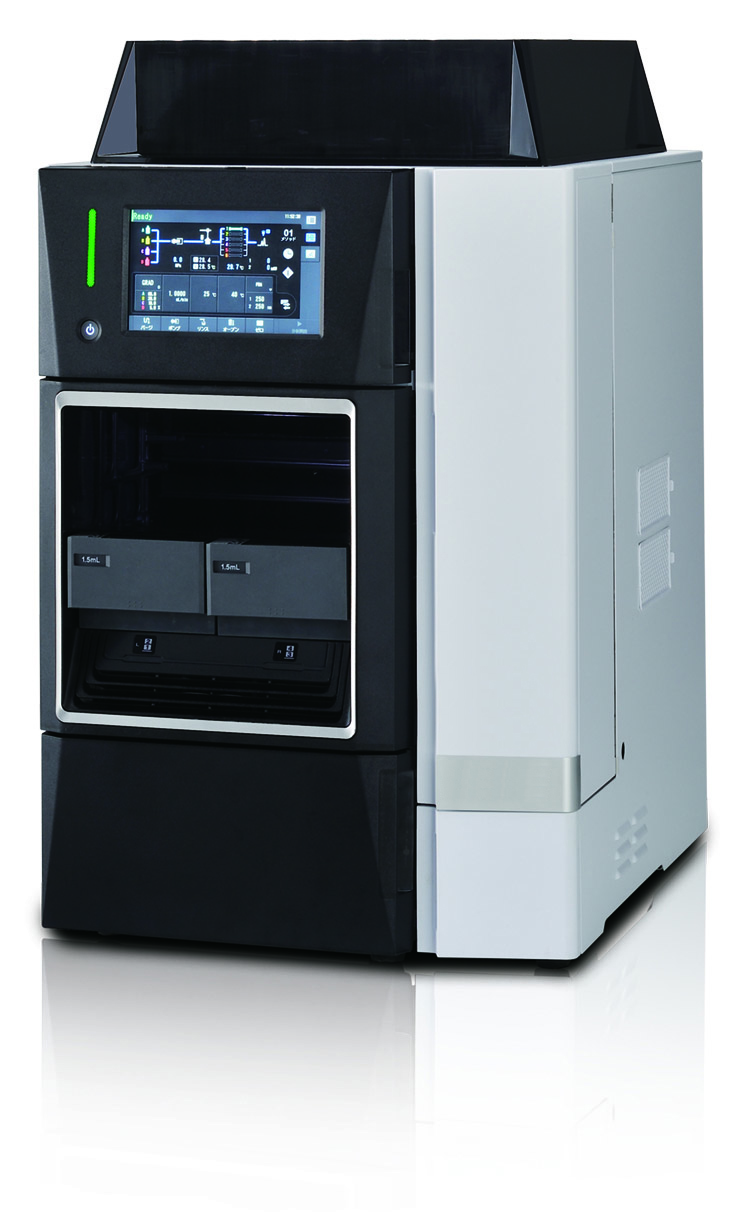
For potency testing, traditional high-performance liquid chromatography (HPLC) is recommended and has become the gold standard for analyzing cannabinoid profiles. Look for a turnkey HPLC analyzer that delivers a comprehensive package that integrates instrument hardware, software, consumables and proven HPLC methods.

Heavy Metal Testing

ICP-MS instrument for detecting heavy metals in cannabis.

Different types of metals can be found in soils and fertilizers, and as cannabis plants grow, they tend to draw in these metals from the soil. Heavy metals are a group of metals considered to be toxic, and the most common include lead, cadmium, arsenic and mercury. Most labs are required to test and confirm that samples are under the allowable toxic concentration limits for these four hazardous metals.

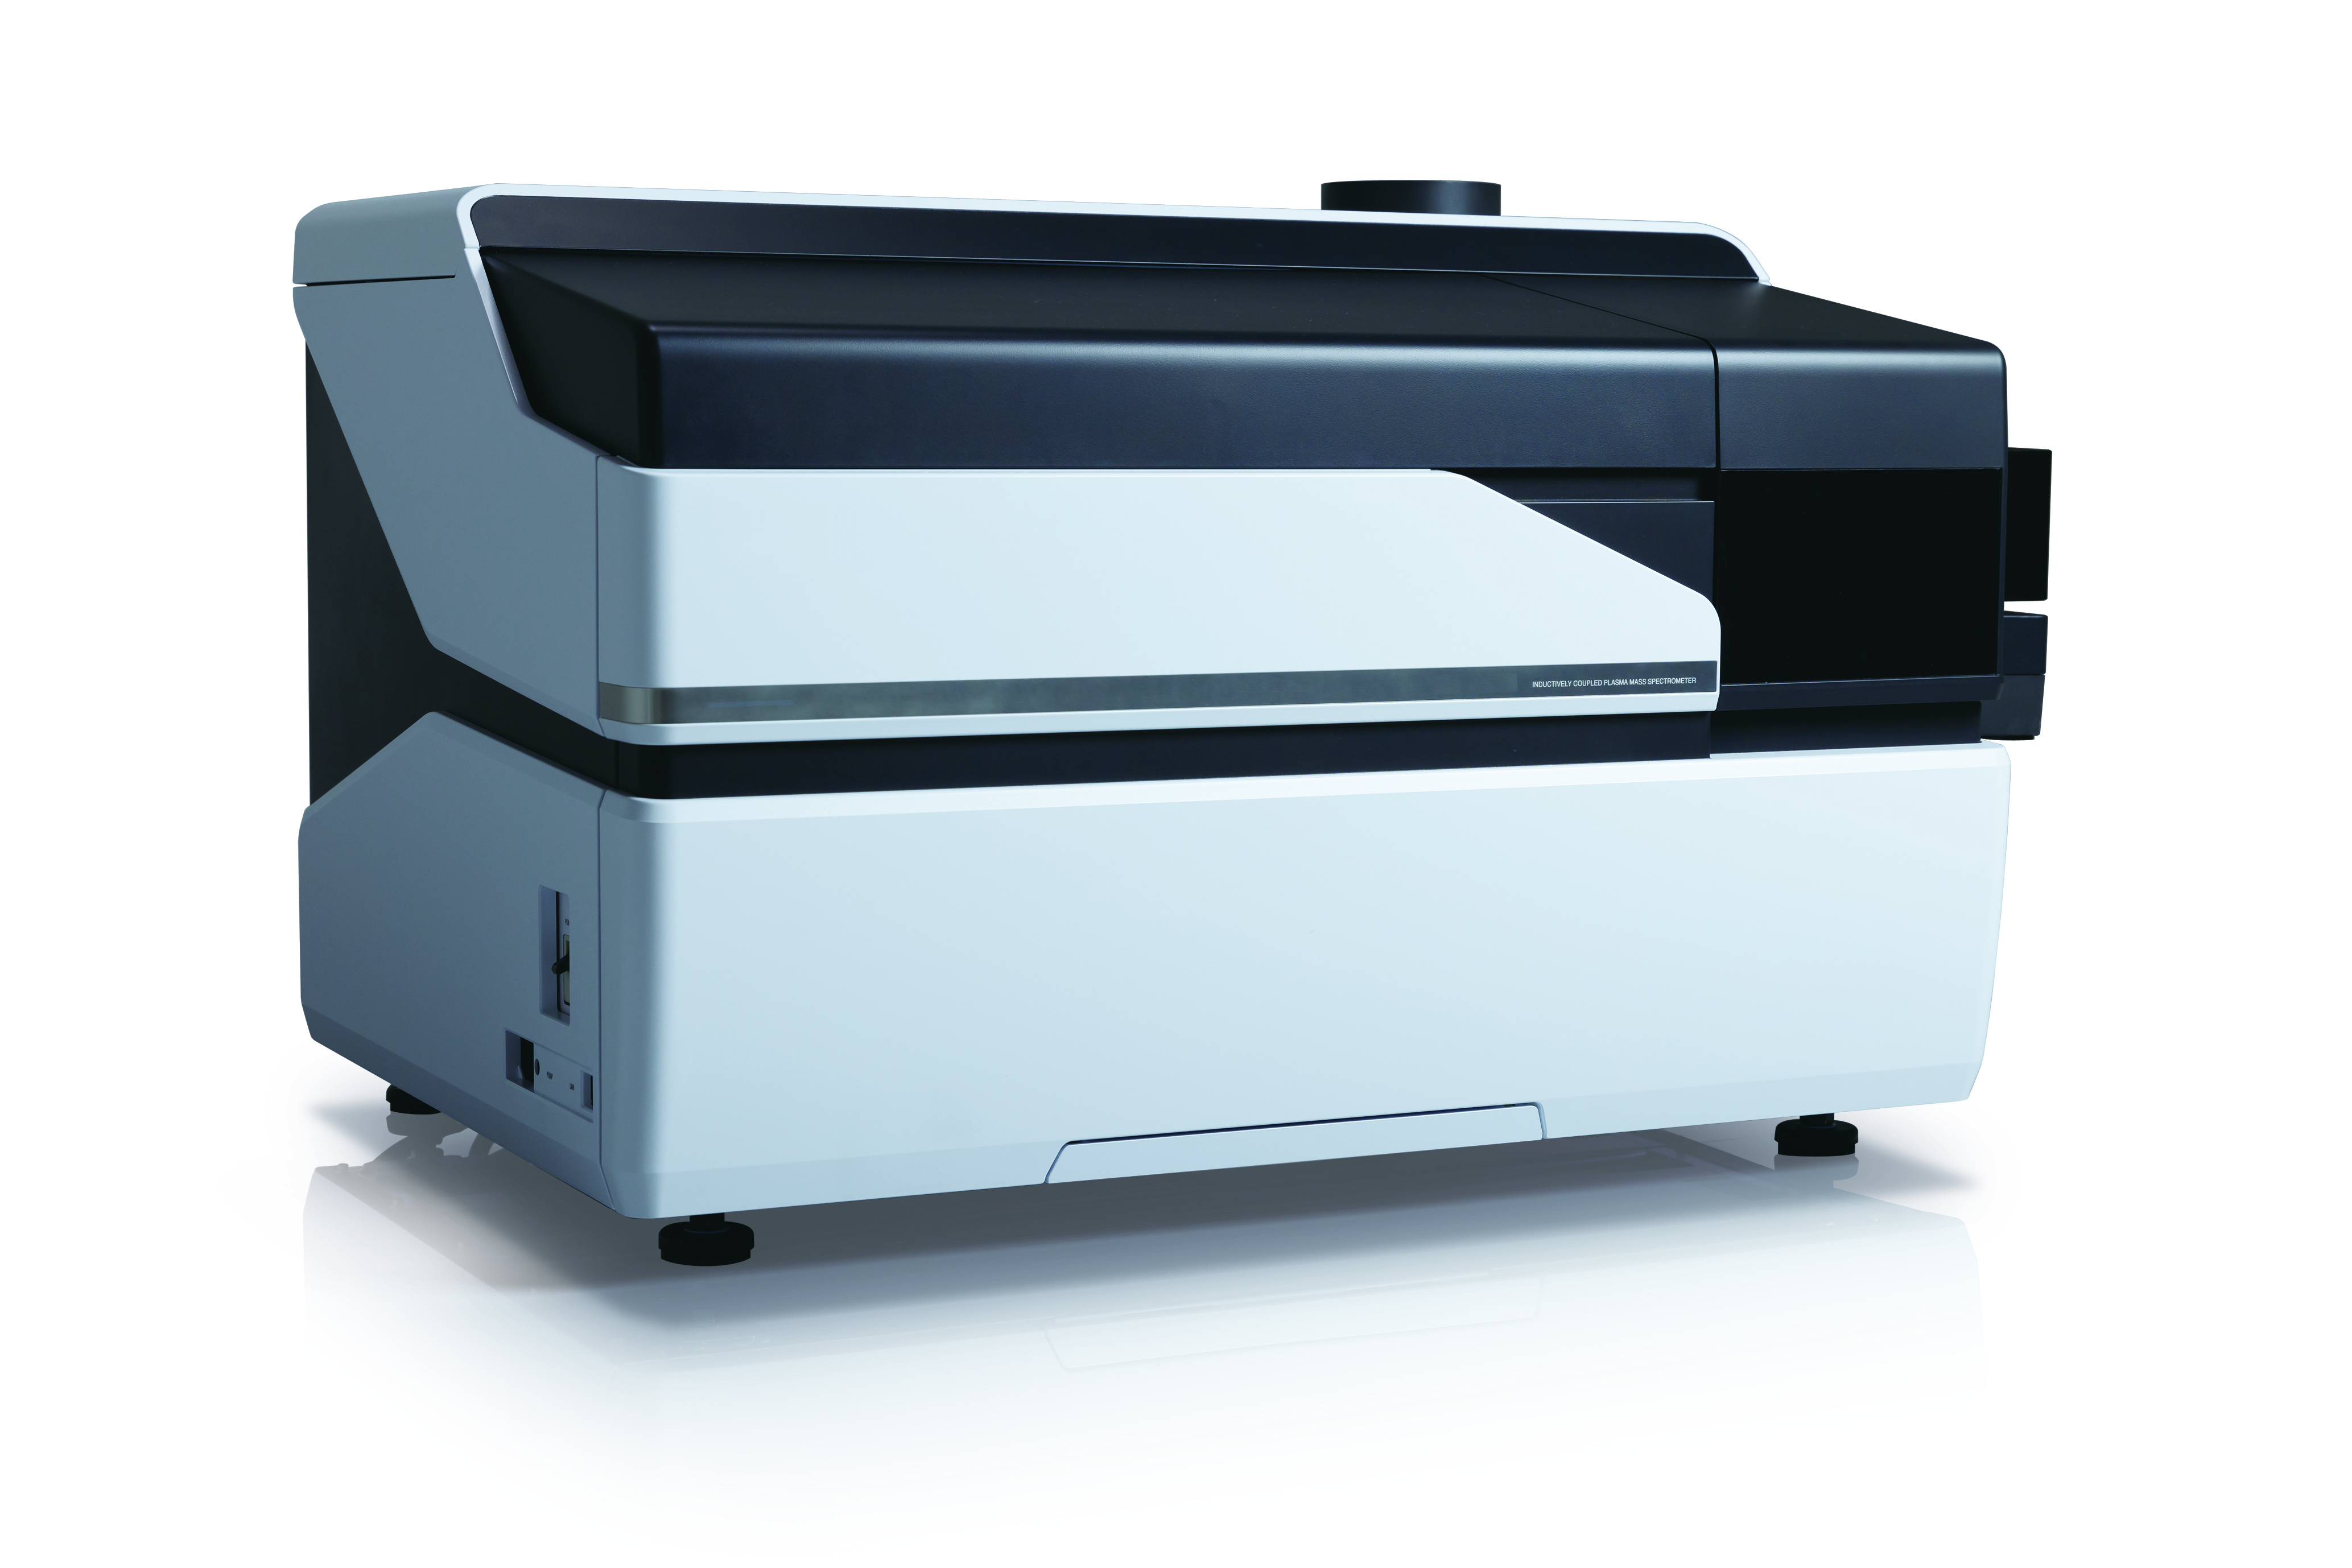
Heavy metal testing is performed by inductively coupled plasma mass spectrometry (ICP-MS). ICP-MS uses the different masses of each element to determine which elements are present within a sample and at what concentrations. Make sure to include accompanying software that provides assistant functions to simplify analysis by developing analytical methods and automatically diagnosing spectral interference. This will provide easy operation and analytical results with exceptionally high reliability.

To reduce running costs, look for a supporting hardware system that reduces the consumption of argon gas and electricity. For example, use a plasma ignition sequence that is optimized for lower-purity argon gas (i.e., 99.9% argon as opposed to more expensive 99.9999%).

Pesticide Testing

The detection of pesticides in cannabis can be a challenge. There are many pesticides that are used in commercial cannabis grow operations to kill the pests that thrive on the plants and in greenhouses. These chemicals are toxic to humans, so confirming their absence from cannabis products is crucial. The number of pesticides that must be tested for varies from state to state, with Colorado requiring only 13 pesticides, whereas Oregon and California require 59 and 66 respectively. Canada has taken it a step further and must test for 96 pesticides, while AOAC International is developing methods for testing for 104 pesticides. The list of pesticides will continue to evolve as the industry evolves.

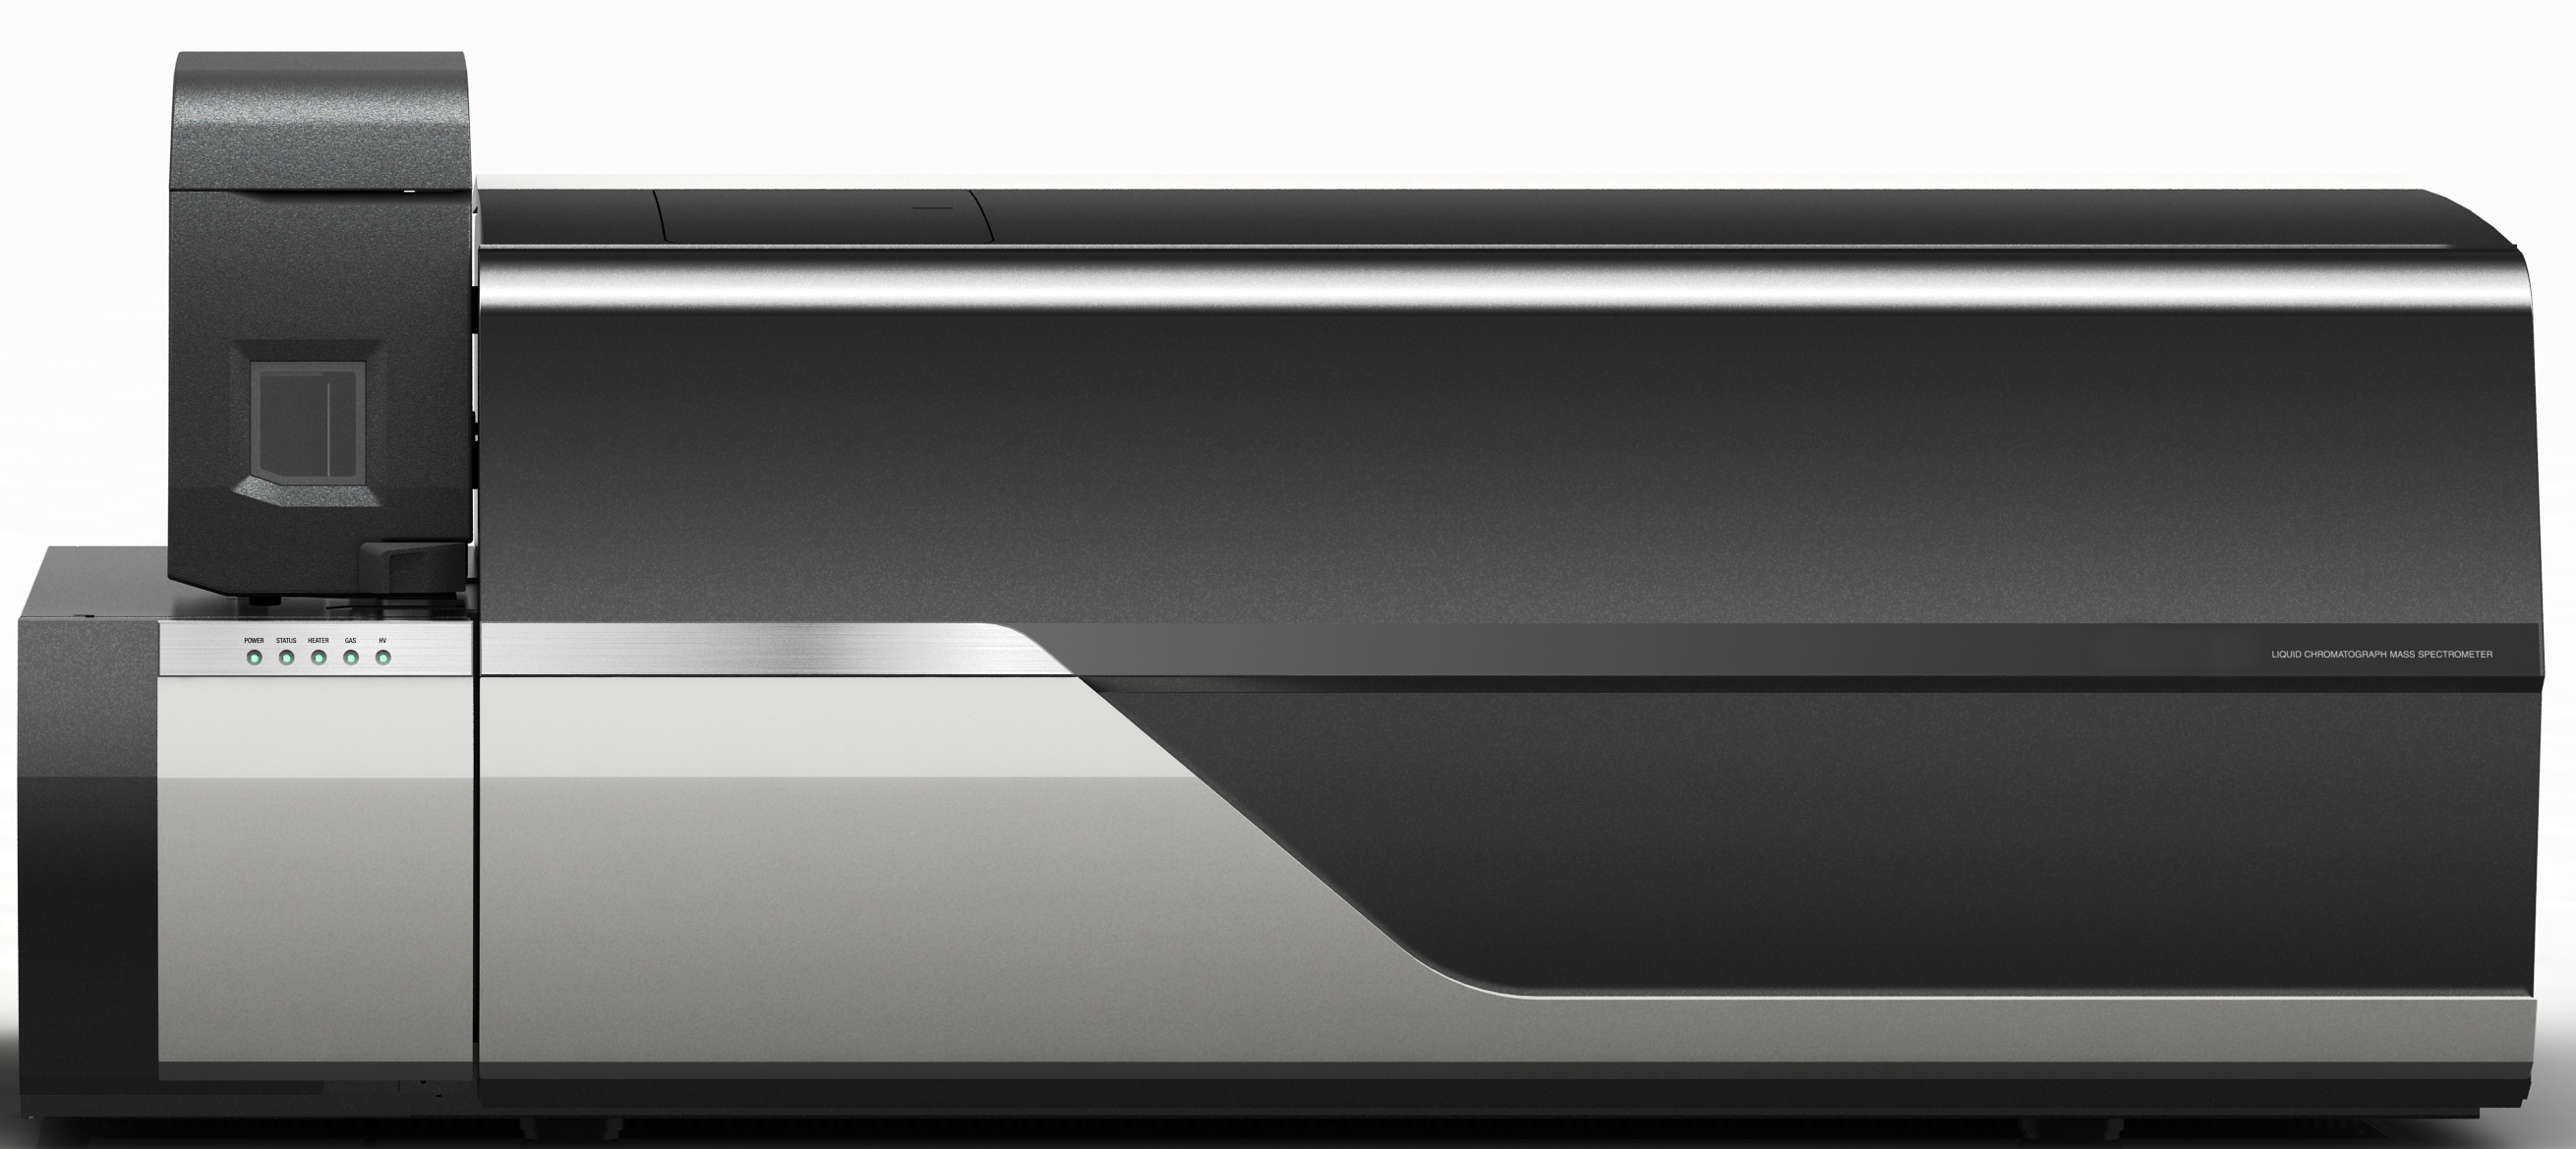
Testing for pesticides is one of the more problematic analyses, possibly resulting in the need for two different instruments depending on the state’s requirements. For a majority of pesticides, liquid chromatography mass spectrometry (LCMS) is acceptable and operates much like HPLC but utilizes a different detector and sample preparation.

With excellent sensitivity and ultra-low detection limits, LC-MS/MS is an ideal technique for the analysis of pesticides.

Pesticides that do not ionize well in an LCMS source require the use of a gas chromatography mass spectrometry (GCMS) instrument. The principles of HPLC still apply – you inject a sample, separate it on a column and detect with a detector. However, in this case, a gas (typically helium) is used to carry the sample.

Look for a LC-MS/MS system or HPLC system with a triple quadrupole mass spectrometer that provides ultra-low detection limits, high sensitivity and efficient throughput. Advanced systems can analyze more than 200 pesticides in 12 minutes.

For GCMS analysis, consider an instrument that utilizes a triple quadrupole mass spectrometer to help maximize the capabilities of your laboratory. Select an instrument that is designed with enhanced functionality, analysis software, databases and a sample introduction system. Also include a headspace autosampler, which can also be used for terpene profiles and residual solvent testing.

Residual Solvent Testing

Residual solvents are chemicals left over from the process of extracting cannabinoids and terpenes from the cannabis plant. Common solvents for such extractions include ethanol, butane, propane and hexane. These solvents are evaporated to prepare high-concentration oils and waxes. However, it is sometimes necessary to use large quantities of solvent in order to increase extraction efficiency and to achieve higher levels of purity. Since these solvents are not safe for human consumption, most states require labs to verify that all traces of the substances have been removed.

Testing for residual solvents requires gas chromatography (GC). For this process, a small amount of extract is put into a vial and heated to mimic the natural evaporation process. The amount of solvent that is evaporated from the sample and into the air is referred to as the “headspace.” The headspace is then extracted with a syringe and placed in the injection port of the GC. This technique is called full-evaporated technique (FET) and utilizes the headspace autosampler for the GC.

Look for a GCMS instrument with a headspace autosampler, which can also be used for pesticide and terpene analysis.

Terpene Profile Testing

Terpenes are produced in the trichomes of the cannabis leaves, where THC is created, and are common constituents of the plant’s distinctive flavor and aroma. Terpenes also act as essential medicinal hydrocarbon building blocks, influencing the overall homeopathic and therapeutic effect of the product. The characterization of terpenes and their synergistic effect with cannabinoids are key for identifying the correct cannabis treatment plan for patients with pain, anxiety, epilepsy, depression, cancer and other illnesses. This test is not required by most states, but it is recommended.

The instrumentation that is used for analyzing terpene profiles is a GCMS with headspace autosampler with an appropriate spectral library. Since residual solvent testing is an analysis required by most states, all of the instrumentation required for terpene profiling will already be in your lab.

As with residual solvent testing, look for a GCMS instrument with a headspace autosampler (see above). 

Microbe, Fungus and Mycotoxin Testing

Most states mandate that cannabis testing labs analyze samples for any fungal or microbial growth resulting from production or handling, as well as for mycotoxins, which are toxins produced by fungi. With the potential to become lethal, continuous exposure to mycotoxins can lead to a buildup of progressively worse allergic reactions.

LCMS should be used to qualify and identify strains of mycotoxins. However, determining the amount of microorganisms present is another challenge. That testing can be done using enzyme linked immunosorbent assay (ELISA), quantitative polymerase chain reaction (qPCR) or matrix-assisted laser desorption/ionization time-of-flight mass spectrometry (MALDI-TOF MS), with each having their advantages and disadvantages.

For mycotoxin analysis, select a high-sensitivity LC-MS/MS instrument. In addition to standard LC, using an MS/MS selective detector enables labs to obtain limits of detection up to 1000 times greater than conventional LC-UV instruments.

For qPCR and its associated needs, look for a real-time PCR amplification system that combines thermal cyclers with optical reaction modules for singleplex and multiplex detection of fluorophores. These real-time PCR detection systems range from economical two-target detection to sophisticated five-target or more detection systems. The real-time detection platform should offer reliable gradient-enabled thermal cyclers for rapid assay optimization. Accompanying software built to work with the system simplifies plate setup, data collection, data analysis and data visualization of real-time PCR results.

Moisture Content and Water Activity Testing

Moisture content testing is required in some states. Moisture can be extremely detrimental to the quality of stored cannabis products. Dried cannabis typically has a moisture content of 5% to 12%. A moisture content above 12% in dried cannabis is prone to fungal growth (mold). As medical users may be immune deficient and vulnerable to the effects of mold, constant monitoring of moisture is needed. Below a 5% moisture content, the cannabis will turn to a dust-like texture.

The best way to analyze the moisture content of any product is using the thermogravimetric method with a moisture balance instrument. This process involves placing the sample of cannabis into the sample chamber and taking an initial reading. Then the moisture balance instrument heats up until all the moisture has been evaporated out of the sample. A final reading is then taken to determine the percent weight of moisture that was contained in the original sample.

A moisture balance can provide accurate determination of moisture content in cannabis.

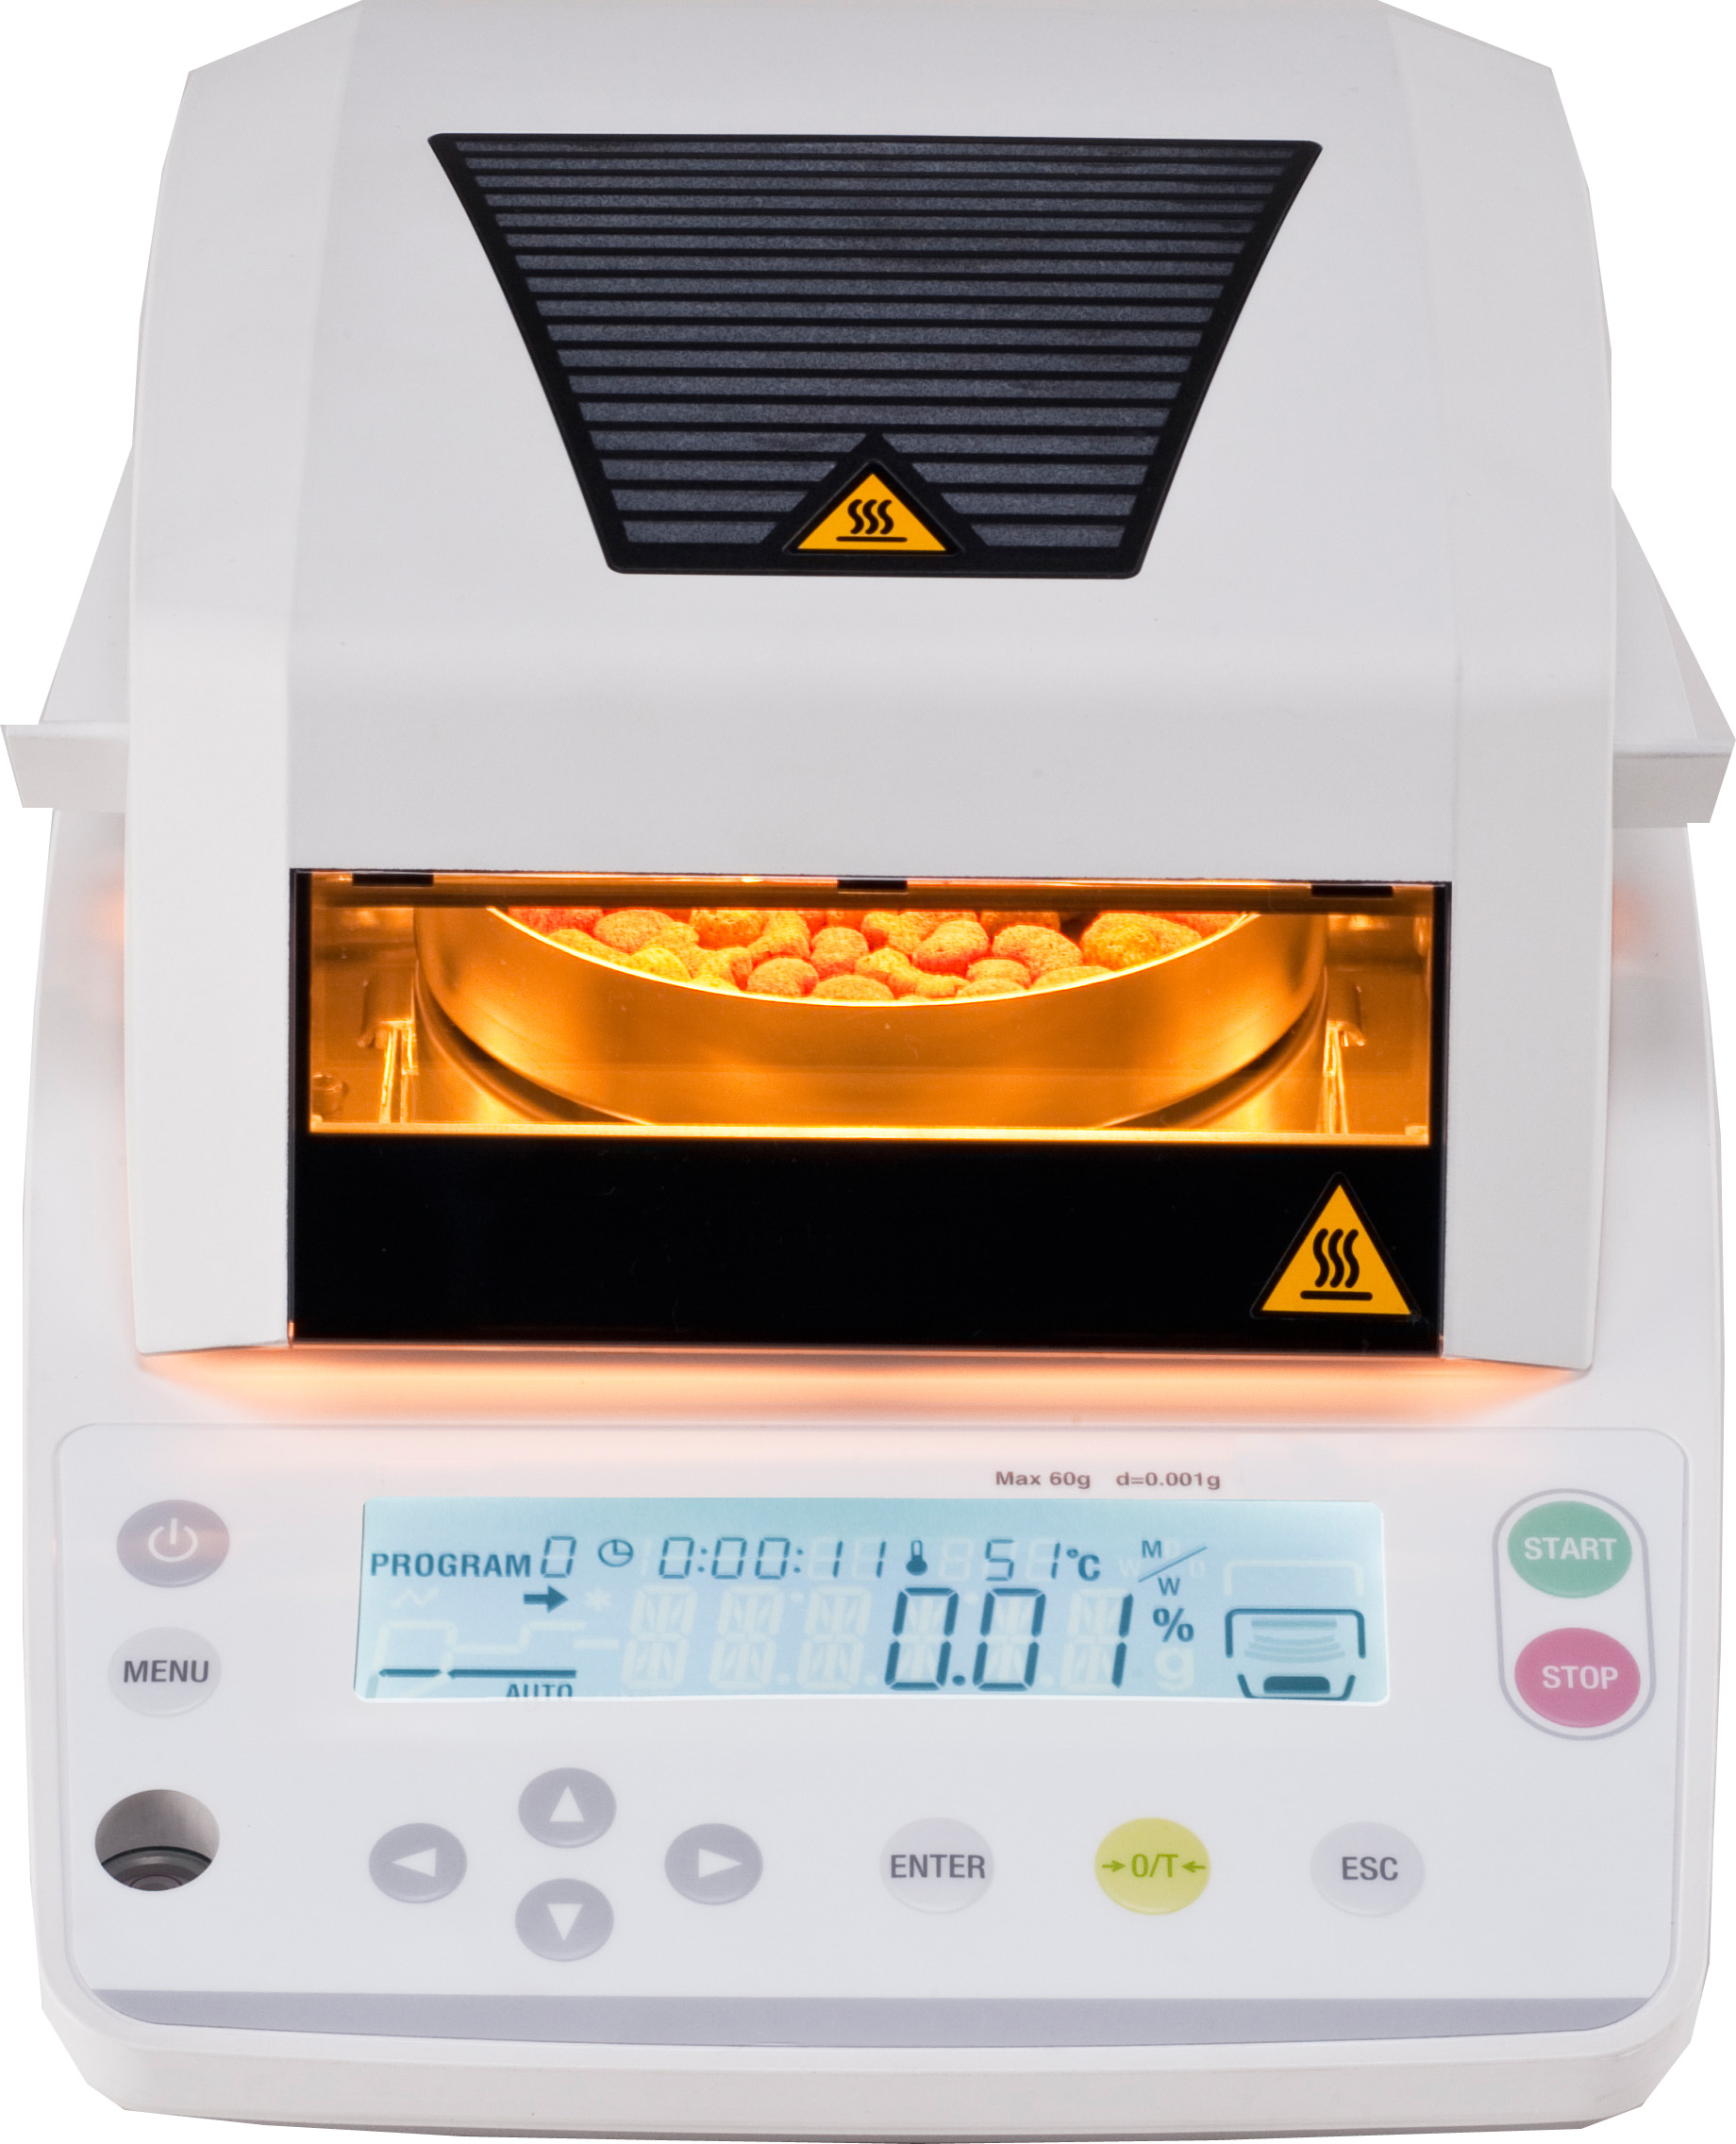
Look for a moisture balance that offers intuitive operation and quick, accurate determination of moisture content. The pan should be spacious enough to allow large samples to be spread thinly. The halogen heater and reflector plate should combine to enable precise, uniform heating. Advanced features can include preset, modifiable measurement modes like automated ending, timed ending, rapid drying, slow drying and step drying.

Another method for preventing mold is monitoring water activity (aW). Very simply, moisture content is the total amount of water available, while water activity is the “free water” that could produce mold. Water activityranges from 0 to 1. Pure water would have an aW of 1.0. ASTM methods D8196-18 and D8297-18 are methods for monitoring water activity in dry cannabis flower. The aW range recommended for storage is 0.55 to 0.65. Some states recommend moisture content to be monitored, other states monitor water activity, and some states such as California recommend monitoring both.

Final Thoughts

As you can see, cannabis growers benefit tremendously from cannabis testing. Whether meeting state requirements or certifying a product, laboratory testing reduces growers’ risk and ensures delivery of a quality product. As medicinal and recreational cannabis markets continue to grow, analytical testing will ensure that consumers are receiving accurately

labeled products that are free from contamination. That’s why it is important to invest in the future of your cannabis testing lab by selecting the right analytical equipment at the start of your venture.

8 Mistakes Businesses Make When Managing Product Labels: Part 1

By Rob Freeman
2 Comments

Editor’s Note: This article contains the first four common labeling mistakes that businesses can make. Click here to view the next four common labeling mistakes


Whether you’re a small business owner or a production manager of a large manufacturer, if you’ve ever experienced problems with your product labels you know it can quickly turn into a serious issue until that problem is resolved. From the time it’s applied to your product all the way to the POS (Point of Sale), labels always seem to be the least significant part of the production process- until something goes wrong. And when it does go wrong, it can create major branding issues and cost your company tens of thousands of dollars due to hefty supply chain late penalties and/or even government fines.

This article aims to provide insight as to how a company like Label Solutions Inc. helps businesses and manufacturers create new labels for their products as well as what to look for should you experience label failure at your retail locations. Topics discussed in this article do not cover all possible issues, but these common mistakes will hopefully help you better understand how creating a product label works, and how to possibly prevent your own problems in the future.

Mistake #1: Not Understanding the Importance Between the “Construction” Versus the “Artwork & Compliance” of the Label

This may seem like common sense, but it is often overlooked. Especially when dealing with fast-track projects.

Construction of the Label is the material selected and production process to produce the label. When creating a new label from the ground up, it is important to factor in how your product will be produced, necessary shipping and supply chain needs, how it is stored in inventory and how it will be presented at the POS. Understanding what environments your product will be exposed to throughout its life cycle will give you an advantage when approving substrate material, inks, and the strength of adhesive that might be necessary for your application.

The Artwork & Compliance of the Label refers to the overall design of the label, artwork, customer messaging, bar codes and regulatory requirements you need to follow in order to avoid serious government fines that might relate to your industry (Referring to agencies such as OSHA, DOT, and the FDA).In most cases the construction of the label does not apply to the compliance of the label.

Most label providers do not have the in-house expertise to offer compliance assistance. Although it is still the manufacturer who is liable for all final artwork approvals on their product, label providers that do offer advisory services can help update label content when regulatory changes are enacted. This “safety net” can save your company from extra production costs and, potentially, excessive legal time and material costs. In short, you should always review final label artwork approvals with your compliance team and/or legal expert, but it never hurts to have a “safety net” to help eliminate unnecessary orders or production delays.

In most cases the construction of the label does not apply to the compliance of the label. An exception to this statement would be industries such as the electronics industry that use UL (Underwriter Laboratories) labels that must meet UL specifications and be produced under recognized UL files. In other words, the compliance of a UL label is the construction of the label.

Best Method Approach: An excellent example of companies that understand the difference between the Construction vs. Artwork & Compliance of the label would be the compressed gas industry. Gas suppliers and distributors require long term regulatory compliant labels on their cylinders and micro-bulk tanks. These gas tanks are used in a wide variety of industries such as for manufacturing, welding, medical procedures, and specialty gas mixes for the micro-electronics industry.

The compressed gas industry requires that their labels follow strict, up-to-date OHSA and DOT compliance requirements. As for the construction of the label, it is common practice that the label remains legible on the cylinder for an average of five years. The 5-year duration is due to the millions of tanks that are in circulation throughout the US and Canada. What’s more, each label is produced to adhere to the cylinder’s metal surface during extreme outdoor weather conditions such as fluctuating temperatures, freezing rain, high winds, and direct sunlight year-round.

Mistake #2: Applying Labels Incorrectly to Your Products

Whether the label is applied to the product surface by hand or automatically with a label applicator, the label itself may not be applied level or evenly. Besides this being a major branding issue, this could also affect how the bar codes are scanned and could eventually impact your delivery times while trying to correct a batch.

Best Method Approach: There are construction alternatives that you can choose from to potentially reduce the impact of incorrect label application. For example, products with certain label adhesives allow your production team to reposition the label within a few minutes before the tack completely sets to the surface. The type of surface (cardboard, metal, plastic, glass, etc.) and the type of adhesive will determine how much time your production team will have before the tack sets.

The best practice is to apply labels prior to filling the bottles and cans as opposed to filling first and then applying the label in your production line.A good example of this best practice can be seen in the beverage market. Whether the client produces a uniquely crafted beer, or a rare ingredient infused into a new health drink, labels that are auto-applied to bottles and cans will sometimes experience equipment tension issues that need to be recalibrated. Once labels are applied off-alignment, a delayed tack setting can allow the label to be quickly repositioned by hand when needed. The best practice is to apply labels prior to filling the bottles and cans as opposed to filling first and then applying the label in your production line. The reason, excess spillage from filling can interfere with most adhesives.

This same repositionable adhesive is excellent to keep in mind for large equipment production assembly lines that apply prime (branding) labels and warning labels by hand. Even with large wide-format labels, the adhesive tack can be formulated so your employees have a few minutes to adjust, straighten, and smooth away trapped air bubbles once it has been placed on the surface. Knowing you have this option can help reduce label inventory waste, additional production material wastes and avoid delaying production time. More importantly, this option keeps your brand and your warning/instructional labels looking fresh.

Mistake #3: Not Sharing Your Production Run Schedules with Your Label ProviderSupply chain management (SCM) models are excellent examples of the best approach.

Some of Label Solutions’ largest accounts have the most efficient real-time tracking supply chain models in North America, but even they cannot avoid sudden increased orders for their products stemming from high customer demand or similar issues. It is a good problem to have, but it is a problem, nonetheless. Manufacturers utilize supply chain management tools to notify their suppliers of their monthly order forecasts, which in turn helps suppliers manage their materials and deliveries more efficiently.

On the other side of the spectrum, when small businesses share their production schedules with a supplier it means that both parties (the manufacturer and label provider) understand when to expect higher or lower order quantities each month. Label providers should back date their label production schedules, so they have the materials available to handle your busier months while ensuring on-time deliveries.

Best Method Approach: Supply chain management (SCM) models are excellent examples of the best approach. Although SCM’s are designed for scalability and real-time tracking, the benefit to you also helps your label supplier. For example, our large retail and industrial manufacturing clients notify the Label Solutions team to produce their labels according to their Supply Chain portal demand schedules. This, in turn, allows label suppliers to allocate production time and materials more efficiently for your last-minute rush orders.

Smaller companies can take a much more simplified approach (without the SCM tracking) to help their suppliers manage their orders – even if they do not use supply chain management. A simple Excel report of production runs over a 12-month time frame is ideal. If your label provider does not already practice this or similar methodology, it might be time to start looking for a more proactive label provider. If you’re unsure you want to share your information, then you might consider requiring your label provider to sign an NDA (Non-disclosure Agreement).

Mistake #4: Not Accepting Alternative Sizes of the Label to Allow for Better Pricing

If your product needs a label with, for example, a dimension of 5.25 X 6.75 inches, there might be a much better price point offered to you if you’re open to switching to a slightly different dimension label of, say, 5 X 7 inches.  Obviously, you need to make sure the new dimension would fit your product(s) and work with your production line. But, if alternate dimensions are within the scope of the project, a modified SKU could potentially cut down on cost and production time.

Best Method Approach: You might not have the time or ability to change your label if you already market that product in retail stores. But, if you are changing your branding, creating a new style of label, or releasing a completely new product, this is the ideal time to consider implementing better continuity between your products. This could include elements such as matching colors and label/packaging design.

In addition to updating your SKU’s, this might also be an opportunity for your company to consolidate multiple products onto a universal label size. By applying the same sized labels to multiple SKU’s, you can increase efficiency regarding repeated label orders, especially for label printers that use digital printers. Combine this approach with your expected annual quantity estimates and you’ll be positioned for very efficient ordering options as your company grows.


Editor’s Note: We’ll cover the next four most common labeling mistakes in Part Two coming next week. Stay tuned for more!

Soleil control panel

IoT & Environmental Controls: urban-gro Launches Soleil Technologies Portfolio

By Aaron G. Biros
No Comments
Soleil control panel

Back in November of 2017, urban-gro announced the development of their Soleil Technologies platform, the first technology line for cannabis growers utilizing Internet-of-Things (IoT). Today, urban-gro is announcing that line is now officially available.

Soleil control panel
Screenshot of the data you’d see on the Soleil control panel

The technology portfolio, aimed at larger, commercial-scale growers, is essentially a network of monitors, sensors and controls that give cultivators real-time data on things like temperature, humidity, light, barometric pressure and other key factors. The idea of using IoT and hypersensitive monitoring is not new to horticulture, food or agriculture, but this is certainly a very new development for the cannabis growing space.

sensor
Substrate sensors, used for monitoring Ph, soil moisture & electrical conductivity.

According to Brad Nattrass, chief executive officer and co-founder of urban-gro, it’s technology like this that’ll help growers control microclimates, helping them make the minor adjustments needed to ultimately improve yield and quality. “As ROI and optimized yields become increasingly important for commercial cultivators, the need for technologies that deliver rich granular data and real-time insights becomes critical,” says Nattrass. “With the ability to comprehensively sense, monitor, and control the microclimates throughout your facility in real-time, cultivators will be able to make proactive decisions to maximize yields.”

heat map
The heat map allows you to find problem microclimates throughout the grow space.

One of the more exciting aspects of this platform is the integration of sensors, and controls with automation. With the system monitoring and controlling fertigation, lighting and climate, it can detect when conditions are not ideal, which gives a cultivator valuable insights for directing pest management or HVAC decisions, according to Dan Droller, vice president of corporate development with urban-gro. “As we add more data, for example, adding alerts for when temperatures falls or humidity spikes can tell a grower to be on the lookout for powdery mildew,” says Droller. “We saw a corner of a bench get hot in the system’s monitoring, based on predefined alerts, which told us a bench fan was broken.” Hooking up a lot of these nodes and sensors with IoT and their platform allows the grower to get real-time monitoring on the entire operation, from anywhere with an Internet connection.

soleil visuals
Figures in the system, showing temperature/time, humidity/time and light voltage

Droller says using more and more sensors creates super high-density data, which translates to being able to see a problem quickly and regroup on the fly. “Cannabis growers need to maintain ideal conditions, usually they do that with a handful of sensors right now,” says Droller. “They get peace of mind based on two or three sensors sending data points back. Our technology scales to the plant and bench level, connecting all of the aggregate data in one automated system.”

In the future, urban-gro is anticipating this will lay the groundwork for using artificial intelligence to learn when controls need to be adjusted based on the monitoring. Droller hopes to see the data from environmental conditions mapped with yield and by strain type, which could allow for ultra-precise breeding based on environmental conditions. “As we add more and more data and develop the platform further, we can deliver some elements of AI in the future, with increased controls and more scientific data,” says Droller.