Tag Archives: sterile

Building An Integrated Pest Management Plan – Part 3

By Phil Gibson
No Comments

This is the third in a series of articles designed to introduce an integrated pest management framework for cannabis cultivation facilities. To see Part One, click here. For Part Two, click here. Part Four comes out next week and covers direct control options for pest reduction. More to come!

This is Part 3: Preventive Measures

Preventive measures are a great investment in the profitability of your operations. Our objective is to ensure successful repeat harvests forever. Build your procedures with this in mind. This means maintenance and regular review. We all realize that this work can be monotonous drudgery (we know!), but these procedures will ensure your success.
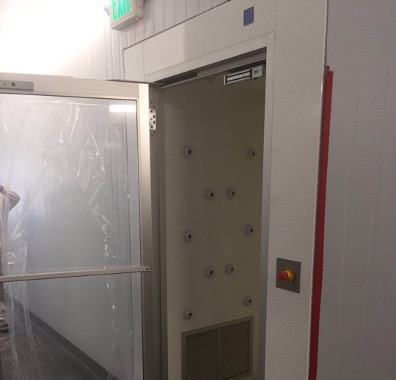
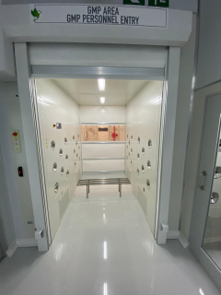
Figure 1: New Air Shower Access Installation

As a summary to begin, pest access must be limited wherever possible. Employees are the first place to start, but we must also return to our site map and review our facility design and workflows. Every operation has to move plants from nursery through harvest and post-harvest. Where should cleaning happen? Of course, you have to clean up post-harvest but when should this occur during the grow cycle? What is the best way to monitor and clean environmental management systems (i.e. air, water) and what are the weaknesses in the physical barriers between operations? Let’s walk through these issues one-by-one.

Employee Access and Sterile Equipment

Follow procedures to screen and protect your employees both to eliminate pests and to avoid exposing your employees to harmful chemicals or storage areas. Look for ways to isolate your workflow from pest access. Be certain that your facility is airtight and sealed with filtration of molds, spores and live organisms in your air intake areas. Air showers at your access points are important to screen your employees on their way into your gowning areas and grow facility. Clothing should be standardized and shoe coverings or crocs should be provided for all employees that access your interior. Look for ways to stop all pests (embedded, crawling, hopping or flying) in all of your room assignments (mothers, clone, veg, flower, trim and drying). This can be improved with shoe baths, sticky mats, frequent hygiene (hand washing and cleaning stations) and procedures for entry.

Always consider requiring hair & beard nets, shoe covers and disposable gloves in plant sensitive areas.

Chemical Access & Protective Equipment

Figure 2: Example Facility Map – Understand Workflow & Barriers to Pest Access

Personal protection equipment (PPE) is very important to protect any employee that will come in contact with materials, liquids or vapors for chemical resources. Establish procedures for chemical use and train employees in the safe handling of these materials. Typical equipment includes high density chemical protective gloves, boots, respirators, Tyvek (or equivalent protective wear) suits and eye protection or goggles.

Chemical access areas and their use should be restricted to employees familiar with their authorized application. Always remember that cannabis is an accumulator plant, and it will absorb and hold onto chemical treatments. Appropriate isolation and safety procedures must be followed for chemical use. Not following these restrictions can expose your employees to dangerous chemicals or get your entire harvests rejected at testing.

Facility Map & Workflow

Because insects would like to be everywhere and they come in many types (root zone, crawling, flying, microscopic, bacterial or biofilm), the facility workflow must understand where they are and how they might migrate if they penetrate your defenses. Note airflows in your rooms and fan locations so migrations can be predicted once an infestation is located. Where are your opportunities for full clean-up and disaster recovery in your building? Where should you stage maintenance filters, test kits, water and cleaning materials. How best to clean up and dispose of sealed garbage containers or cleaning materials?

Operational Cleaning & Post-Harvest Reset

When compiling your preventative measure documents, it is critical to create a repeatable operating procedure for cleaning and sanitizing your rooms, systems, and growing spaces after each harvest. Plant material handling, cleaning surfaces and wipe methods should all be documented in your Standard Operating Procedures (SOPs). Define what “clean” is. Removing plants and plant debris is pretty clear but define how to drain reservoirs, clean pipes, change filters and clean and sterilize your rooms. Operators must be trained in these SOPs and reminded of their content on a regular schedule. This is how you avoid outbreaks that can crush your profits.

Physical Barriers & Maintenance
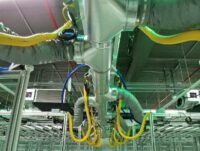
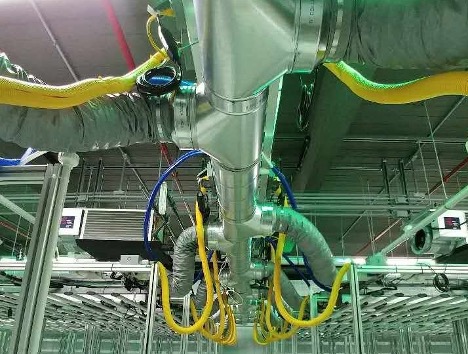
Figure 3: HVAC Air Filtration, Dehumidification, & Air Movement, Onyx Agronomics

Document your sealed spaces and define your normal room and access door barrier interfaces. Review the status of any known cracks or gaps in your perimeter. Are there any known leaks or piping that has been seen as a risk or a problem in the past? Are there any discoloring or resident mold locations (Never happens, right?). Baseline how much time and people resource a harvest operation and cleaning effort should take. Will you do this after every harvest or compromise your risk by delaying to every third or fourth harvest? Create your barrier SOP.

Environmental Control & HVAC

Managing the air quality provided to your plants is critical to your yields. Controlling CO2, air movement rates (the leaf happy dance), humidity, air filtration and sterilization methods must be maintained and cleaned on a regular basis. Do you need to change the HEPA or other particulate filters? Is there any UV light sterilization maintenance? We have all seen the home HVAC air conduit cleaning commercials. Your commercial facility is no different. How will you clean your air and water plumbing systems? How often will you perform this full reset? When will you calibrate and data log your sensors for temperature, humidity, CO2 and water resources? Put everything about your environmental set points into your maintenance document and decide when to validate these. Molds, mildews and biofilm hazards are all waiting for unmonitored systems to open the door for access.

In Conclusion, This Week

If you’re an IPM nerd and this dynamic topic did not put you to sleep, you can read more detail and examples for your integrated pest management procedures in ourcomplete white paper for Integrated Pest Management Recommendations, download the document here.

In our next chapter, Direct Control Options, we will review what you can use to protect or recover control of your facility including both chemical and non-chemical tools and methods. In our final two chapters, we will discuss extermination of the determined pests that breach your defenses. And with great expectations, our final chapter will discuss emergency response and time to go to war!

Part Four comes out next week. See you again soon!

The 3-Legged Stool of Successful Grow Operations: Climate, Cultivation & Genetics – Part 4

By Phil Gibson
No Comments

This is Part 4 in The 3-Legged Stool of Successful Grow Operations series. Click here to see Part 1, here to see Part 2, and here to see Part 3. Stay tuned for Part 5, coming next week.

Integrated Pest Management (IPM)

Aeroponic & hydroponic systems can operate with little to no soil or media. This eliminates the pest vectors that coco-coir, peat moss/perlite and organic media can harbor as part of their healthy biome approach. Liquid nutrient systems come at the nutrient approach from a different direction. Pure nutrient salts (nitrogen, potassium, magnesium and trace metals) are provided to the plant roots in a liquid carrier form. This sounds ideal for integrated pest management programs, but cultivators have to be aware of water and airborne pathogens that can disrupt operations. I will summarize some aspects to consider in today’s summary.

The elimination of soil media intrinsically helps a pest management program as it reduces the labor required to maintain a grow and the number of times the grow room doors are opened. Join that with effective automation with sensors and software, and you have immediate improvements in pest access. Sounds perfect, but we still have staff to maintain a facility and people become the number one source of contamination in a grow operation.

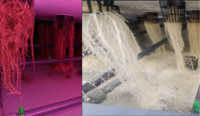
Figure 1: Example of Pythium Infected & Healthy Roots

Insects do damage directly to plants as they grow and procreate in a grow room. They also carry other pathogens that infect your plants. For example, root aphids, a very common problem, are a known carrier of the root pathogen, Pythium.

Procedures

One of the most common ways for pests to access your sealed, sterile, perfectly managed facilities are in the root stock of outsourced clones. If you must start your grow cycles with externally sourced clones, it is strongly recommended that you quarantine those clones to make sure that they do not import pest production facilities into your operation. Your operation management procedures must be complete. If you take cuttings from an internal nursery of mother plants, any pathogens present in your mother room will migrate through cuttings into your clones, supply lines, and subsequently, flower rooms.

Figure 2: Healthy Mothers & Clones, Onyx Agronomics

Start your gating process with questioning your employees and visitors. Do they grow at home or have they been to another grow operation in the last week? In the last day? You may be surprised by how many people that gain access to your grow will answer these questions in the affirmative.

Developing standard operating procedures (SOPs) that are followed by every employee and every visitor will significantly reduce your pest access and infection rates, and hence, increase your healthy harvests and increase your profitability. Procedures should include clothing, quarantining new genetics and cleaning procedures, such as baking or irradiating rooms to guarantee you begin with a sterile facility. This is covered more in the complete white paper.

Engineering Controls

Figure 3: Access Control: Air Shower, FarmaGrowers

Technology is a wonderful thing but no replacement for regimented procedures. Considered a best practice, professional air showers, that bar access to internal facilities, provide an aggressive barrier for physical pests. These high velocity fan systems and exhaust methods blow off insects, pollen and debris before they proceed into your facility. From that access port into your grow space, positive air flow pressure should increase from the grow rooms, to the hallways, to the outside of your grow spaces. This positive airflow will always be pushing insects and airborne material out of your grow space and away from your plants.

Maintaining Oxidation Reduction Potential (ORP)

ORP is a relative measurement of water health. Perfect water is clear of all material, both inert and with life. Reverse osmosis (RO) is a standard way to clear water but it is not sufficient in removing microscopic biological organisms. UV and chemical methods are needed in addition to RO to clear water completely.

ORP is an electronic measurement in millivolts (mV) that represents the ability of a chemical substance to oxidize another substance. ORP meters are a developing area and when using a meter, it is important to track the change in ORP values rather than the absolute number. This is due to various methods that the different meters use to calculate the ORP values. More on this in the white paper.

Oxidizers

Figure 4: AEssenseGrows Aeroponic Nozzles

There are two significant ways to adjust the ORP of a fertilizer/irrigation (fertigation) solution. The first is by adding oxidizers. Examples are chemical oxidizers like hydrogen peroxide (H2O2), hypochlorous acid (HOCl), ozone (O3) and chlorine dioxide (ClO2). Adding these to a fertigation solution increases the ORP of the fertigation solution by oxidizing materials and organic matter. The key is to kill off the bad things and not affect the growth of plants. Again here, the absolute ORP metric is not the deciding factor in the health of a solution and the methods by which each chemical reaction occurs for each of these chemicals are different. This is compounded by the fact that different ORP meters will show different readings for the same solution.

Another wonderful thing about automation and aeroponic and hydroponic dosing systems is that they can automatically maintain oxidizing rates and our white papers explain the methods executed by today’s automation systems.

Water Chilling

Another way to adjust ORP is to reduce the water temperature of the reservoirs. Maintaining water temperature below the overall temperature of your grow rooms is imperative for minimal biological deposition and nutrient system health. Water chillers use a heat exchanger process to export heat from liquid nutrient dosing reservoirs and maintain desired temperatures.

The benefit of managing ORP in aeroponic and hydroponic grow systems is highly accelerated growth. This is enhanced in aeroponics due to the effectively infinite oxygen exchanging gases at the surface of the plant roots. Nutrient droplets are sprayed or vaporized in parallel and provided to these root surfaces. Maximizing the timing and the best mineral nutrients to the root combustion is the art of grow recipe development. Great recipes drive superior yields and when combined with superior genetics and solid environmental controls, these plants will deliver spectacular profits to a grow operation.

Another Hero Award

Before closing this chapter, we have many cultivators that are producing stellar results with their operational and IPM procedures, so it is hard to choose just one leader. That said, our hats are off to RAIR Systems again and their director of cultivation, Ashley Hubbard. She and her team are determined to be successful and drive pests out of their operations with positive “little critters” and the best water treatment and management that we have seen. You are welcome to view the 7-episode walkthrough of the RAIR facility and their procedures here.

To download the complete guide and get to the beef quickly, please request the complete white paper Top Quality Cultivation Facilities here.

Stay tuned for Part 5 coming next week where we’ll discuss Genetics.

The 3-Legged Stool of Successful Grow Operations: Climate, Cultivation & Genetics – Part 3

By Phil Gibson
No Comments

This is Part 3 in The 3-Legged Stool of Successful Grow Operations series. Click here to see Part 1 and here to see Part 2. Stay tuned for Part 4, coming next week.

The Right Build Out

Aeroponic & hydroponic systems grow plants at a highly accelerated rate. A “clean room” type of construction approach is the best way to manage this type of grow operation. Starting with a facility that is completely void of any kind of wood or materials that are porous is a good start. Cellulose materials collect moisture and encourage mold and mildew formation no matter how good the sealant.

We have seen cultivation spaces built out of dry wall over wooden post construction and studs that look sealed and solid on the outside of walls but when repaired for plumbing or other expansion work, they are black inside and covered with nasty mold that no one wants near their grow space.

Panel construction over steel frames or steel studs with skins is a safer, more sterile approach than retrofitting a wooden structure. Panel construction offers the added benefit of rapid assembly and minimal labor costs. We have seen 300 light rooms assembled in a few days so it is both very cost effective and safely sealed for protected growth.

Room Sizes & Count

How do you best fill this space if you have a clean slate?

If you have unlimited space, temperature and humidity management should determine the room sizes in your facility. Room sizes that are square in dimensions tend to be easier to maintain from an environmental standpoint. Long narrow rooms are good for fan airflow but tend to be more expensive from a cooling and dehumidification point of view. The larger the room, the more likely that you will get “microclimates” within the room which can challenge yield optimization.

Now, of course, many grows are retrofits of existing structures so compromises can be necessary. We have found that cultivators that have both very large and mid-size rooms in the same facility (200 lights versus 70 lights) are consistently more successful in the 70 light rooms. These “smaller rooms (~1,500 ft2) out-yielded and out-performed the larger rooms using the same genetics and grow plans. Compartmentalization also minimizes the risk in the case that a calamity (i.e. pest infestation) strikes the room. In a large room scenario, the losses can damage your operation. For this reason, we recommend 70-100 light/tub rooms as a standard.

Rooms should also follow your nursery economics. Structuring your nursery to produce just enough clones/veg plants for your next flower room avoids wasted plant material and resources. Breaking a larger space down into individual rooms means that you need fewer veg plants to fill your flower room that week. The best way to optimize this is to have a number of rooms that are symmetrical with the number 8 (typical 8-week cycle genetics).

With 8 rooms running flower, you are able to plant one room per week for 8 weeks. In the 9th week, you start over on room 1. This continuous harvest process is highly efficient from a labor standpoint and it minimizes the size of your mothers room (cost center). Additional space can be applied to your flower rooms. If you do not have infinite space, even divisors work just as well; 2 or 4 rooms can be planted in sequence for the same optimization (for 2-room structures, harvest and replant 1 room every 4 weeks for example). The optimal structure (8, 16, 24, or more rooms) enables you to optimize your profitability. If any of this needs further explanation, please just ask.

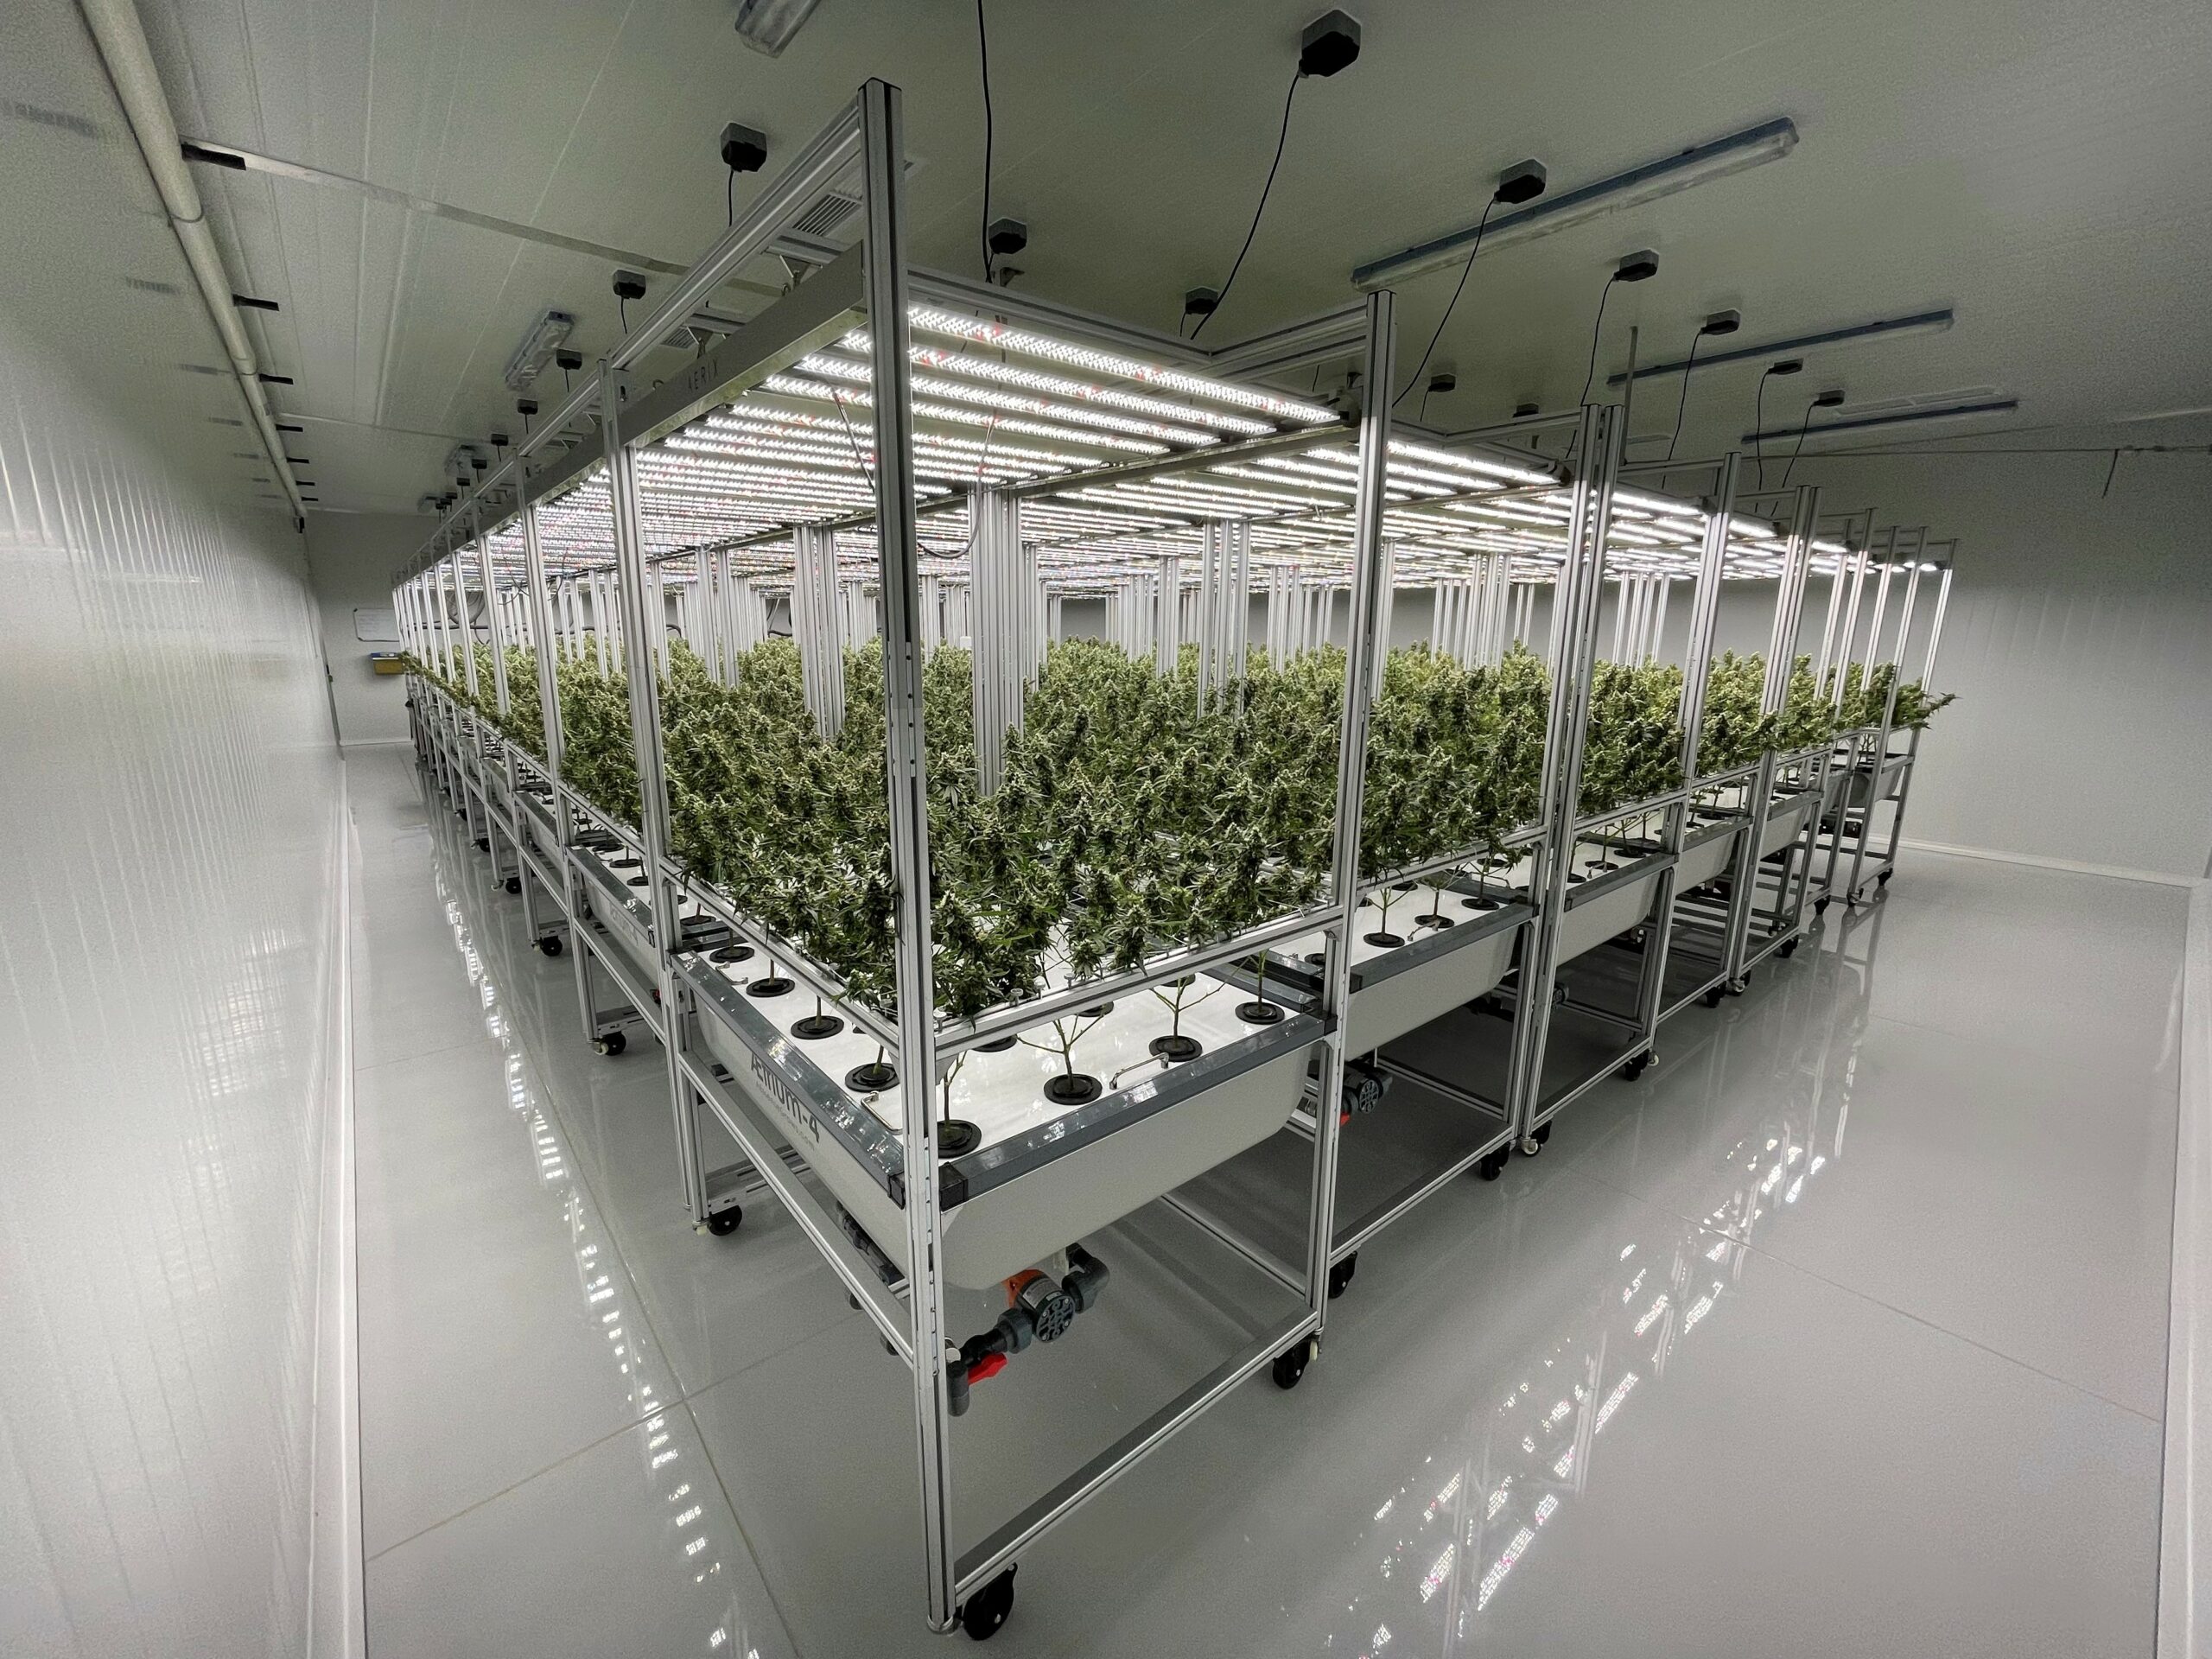
Not photoshopped: An “ideal” 70-tub flower room in a CEA greenhouse (courtesy of FarmaGrowers, South Africa)

Within your room choice, movable rows or columns of tubs/lights also provides optimal yields.  Tubs/plants can be moved together for light usage efficiency and one 3-foot aisle can be opened for plant maintenance. Racking systems or movable trays/tubs make this convenient nowadays.

Floors

Concrete floors offer pockets for bacteria to collect and smolder.  As such, they have to be sealed.  Proper application of your sealant choice is required so that it does not peal up or crack after sealing. There are many benefits to sealed floors that is discussed in the white paper. Floor drains are the equivalent of a portal to Hell for a sterile grow operation. Avoid them at all costs.

Phased Construction

Tuning or optimizing you grow rooms for ideal flowering operation depends on your location. Our advice is that you build and optimize your facility in phases with the expectation that nothing is perfect and you will learn improvements in every phase of expansion. The immediate benefit is production that you can promote to your sales channels and revenue that starts as soon as possible to improve your profitability. This is also an excellent learning curve to apply to subsequent rooms. Our happiest customers are those that learned construction improvements in early rooms that were able to be applied to following rooms without headache. The ability to focus on one or two rooms also allows you to get the recipe correct rather than just relying on “winging it”.

Don’t Be In A Rush To Go Green

A 70-tub flower room (courtesy of FarmaGrowers, South Africa)

Validate your water supplies and their stability. Verify that the water in your aeroponic or hydroponic feeds that get to your plants are clean and sterile. This is much easier in a step-by-step fashion than in a crisis debug mode once production is in progress. Be very cautious about incoming clone supplies. We will talk about this more in the next chapter on Integrated Pest Management but incoming clones are a top pest vector that can contaminate your entire facility.

Warehouse Versus Greenhouse Cultivation Spaces

As we started out, controlling your environment is your most important concern. We have seen success in both indoor rooms and greenhouses. The defining success factor is controlling humidity and temperature. Modern sealed controlled environment (CEA) greenhouses do this well and CEA is somewhat of a given for indoor grows. More details on this in the white paper.

Packaging these recommendations gets you to the perfect body for your Formula 1 race car. Now, you are ready to look at some of the mechanics of protecting your operation from pesky little critters and biologicals that can derail your operation and weaken your engine.

Before we sign off this week, I wanted to highlight the ultimate build-out that we have seen so far.  Of course, there are many challengers that have done this well but at this point, FarmaGrowers in South Africa has the best thought out facility we have seen. They acquired Good Manufacturing Practice (GMP) & Good Agricultural & Collection Practice (GACP) certification early in their operations due to very well-thought-out designs. They are exporting to global markets without irradiation today. Certainly, many successful customers have beautifully thought-out operations and there are several upcoming facilities that offer amazing planning that will challenge for this crown, but for now. FarmaGrowers leads the pack in this aspect. See here for a walkthrough.

To download the complete guide and get to the beef quickly, please request the complete white paper Top Quality Cultivation Facilities here.

Stay tuned for Part 4 coming next week where we’ll discuss Integrated Pest Management.

Cannabis & Chemicals: Why Glove Sourcing is Vital

By Steve Ardagh
No Comments

Freya Farm, a pesticide-free cannabis producer and processor located in Conway, Wash., was recently forced to issue a recall after the chemical o-Phenylphenol, listed under CA Prop 65, was found on its products. Testing traced the antimicrobial compound, known to cause cancer, back to the FDA-compliant food grade gloves used by Freya during packaging.

The reason this could happen with FDA-compliant, food grade gloves needs urgent attention. The production and manufacturing of food contact gloves is largely unsupervised, with limited and infrequent checks on gloves imported into the US. After initial approvals, non-sterile, FDA-compliant food grade gloves are not subject to ongoing controls. This may lead to lower grade and cheap raw materials being used in sub-standard production facilities and processes.

Why “Food Safe” Gloves Aren’t Always Safe

The quality and safety of disposable gloves are limited to Letters of Compliance and Guarantee on the general make and model of the glove, not necessarily the glove you are holding in your hand. There are few controls on the consistency of raw materials, manufacturing processes and factory compliance for both food contact and medical examination grade gloves. Therefore, the opportunity exists for deliberate or accidental contamination within the process of which the Preventive Controls Qualified Individual (PCQI) may not be aware.

Read more about this in Disposable Gloves: The Unregulated Cannabis Threat, previously published in the Cannabis Industry Journal.

The Cost of Recalls

In the words of Freya Farm, “Nothing ruins your day like testing your product, confident it will be clean, only to find it contaminated with some crazy, toxic chemical.” In tracing the issue, the gloves were the last thing Freya Farm tested, as they never suspected something sold as food safe could be the culprit.

A recall of this type can be expensive, as fines range up to $200,000. Since this incident, Freya Farm has implemented a responsible sourcing policy for gloves using supplier Eagle Protect to protect its products, people and brand reputation.

Glove inspection includes five factors of quality controls

Eagle Protect, a global supplier of PPE to the food and medical sectors, is currently implementing a unique proprietary third-party glove analysis to ensure a range of their gloves are regularly checked for harmful contaminants, toxins and pathogens. This Fingerprint Glove Analysis mitigates the risk of intentional or accidental physical, chemical or microbiological glove contamination by inspecting five factors: the use of safe ingredients, cross-contamination potential, cleanliness, structural integrity and dermal compatibility.

Harmful toxins and contaminants in gloves have been identified in many peer reviewed scientific studies. This is now a real issue for companies producing consumer products, especially in industries such as organics and cannabis whose products must be handled by gloves and test clean.

Three key areas that can be tested for in a glove analysis to ensure safe product handling include:

  • Dermal compatibility tests for toxins and chemicals will flag any toxic chemical, such as o-Phenylphenol
  • GCMS testing for consistent quality and safety of glove raw materials
  • Cleanliness tests for pathogens inside and outside the surfaces of gloves – particularly pathogens also required in cannabis testing, such as E. coli and Salmonella, mold and fungus and pesticides.

For cannabis producers responsible glove sourcing is vital, especially as the COVID-related demand for single-use gloves exceeds supply, with poor quality, counterfeit and even reused gloves flooding the market. For producers with a product that rests very much on its quality, it’s important to focus on quality and not just cost when procuring gloves.

Applications for Tissue Culture in Cannabis Growing: Part 3

By Aaron G. Biros
4 Comments

In the first part of this series, we introduced some relevant terms and principles to tissue culture micropropagation and reviewed Dr. Hope Jones’ background in the science of it. In the second part, we went into the advantages and disadvantages of using mother plants to clone and why tissue culture could help growers scale up. In the third part of this series, we are going to examine the five steps that Dr. Jones lays out to successfully micropropagate cannabis plants from tissue cultures.

Cleaning – Stage 0

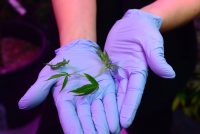
Explant cuttings are obtained from mother plants. The cuttings are further separated into smaller stem pieces with a single node.

Micropropagation includes 5 stages. “Stage 0 is the preparation of mother plants and harvest of cuttings for the explant material,” says Dr. Jones. “To ensure the best chance of growing well in culture, those ladies [the mom’s] should be cleaned up and at their best. And hopefully not stressed by insects or pathogens.” She says growers should also make sure the plants are properly fertilized and watered before harvesting explants. “Obtaining the explants is done with a clean technique using new disposable blades and gloves,” says Dr. Jones. “Young shoot tips are harvested and placed in labeled, large Ziploc bags with a small amount of dilute bleach and surfactant solution, then placed in a cooler and taken to the lab.” This is a process that could be documented with record keeping and data logs to ensure the same care is taken for every explant. “Once in the lab, working in the sterile environment of the transfer hood, the cuttings are sterilized, typically with bleach and a little surfactant, and then rinsed several times with sterile water,” says Dr. Jones. Once they reach the sterile environment, Dr. Jones removes the leaves and cuts the stem down to individual nodes.

Establishment – Stage 1

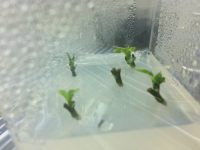
Established explants propagating shoots

Establishment essentially means waiting for the shoots to develop. Establishing the culture requires an absolutely sterile environment, which is why the first step is so important. “Proper explant disinfection is equally as important is the control parameters of the facility itself,” says Dr. Jones. Mother plants are not grown in sterile facilities, but in an environment that is invariably contaminated with dust, which harbors micro-organisms, insects and other potential sources of contamination, including human handling. We discussed some of this in Part 2.

Explants, once sterilized and placed in the culture vessel, must establish to the new aseptic conditions. “Basically Stage 0 ends when the explants are cleaned and placed in the vessel. Stage 1 begins on the shelf while we patiently sit, watch and wait for the shoot growth,” says Dr. Jones. “Successful establishment means we properly disinfected the explants because the cultures do not become contaminated with bacteria or fungi and new shoot growth emerges.”

Multiplication – Stage 2

Stage 2 involves subculturing an explant to produce new shoots

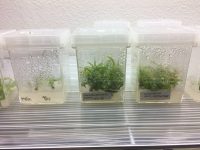
This stage is rather self-explanatory as multiplication simplified means generating many more shoots per explant. In order to create a large number of plants needed for meeting the demand of weekly clone orders, Dr. Jones can break up, or subculture, one explant that contains multiple numerous new shoots. “Let’s say one vessel, which originally started with 4 explants each developed four new shoots. Working in the hood, I remove each explant from the vessel and place it on a sterile petri dish. Now I can divide each explant into 4 new explants and then place the four new explant cuttings into their own vessel. In this example, we started with one vessel with 4 explants,” says Dr. Jones. “Which when subcultured 4-6 weeks later, we now have 4 vessels with 16 plants.” This is instrumental in understanding how tissue culture micropropagation can help growers scale without the need for a ton of space and maintenance. From a single explant, you can potentially generate 70,000 plants after 48 weeks, according to Dr. Jones. “Starting with not 1, but 10 or 20 explants would significantly speed up multiplication.” Using tissue culture effectively, one can see how a grower can exponentially increase their production.

Rooting – Stage 3

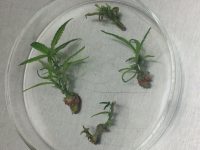
“When the decision is made to move cultures to the rooting stage, we typically need to subculture the plantlets to a different media formulated to induce rooting,” says Dr. Jones. “In some instances, the media is very dark, and that’s because of the addition of activated charcoal.” Using activated charcoal, according to Dr. Jones, helps darken the rooting environment, which closely mimics a normal rooting environment. “It helps remove high levels of cytokinin and other possible inhibitory compounds,” says Dr. Jones. Cytokinins are a type of plant growth hormone commonly used to promote healthy shoot growth, but it is important to make sure the culture contains the right ratio of hormones, including cytokinin and auxin for maximum root and shoot development. Dr. Jones suggests that growers research their own media formulation to ensure nice, healthy roots develop and that no tissue dies in the process. “With everything I grow in culture, when it comes to media, in any stage and with all new strains, I run some simple experiments in order to refine the media used,” says Dr. Jones. She puts a special focus on the concentrations and ratios of plant hormones in formulating her medias.

After harvesting and multiplying, these explants are ready for rooting

“We commonly think of auxin’s role in rooting, but it’s also important in leaves and acts as a regulator of apical shoot dominance,” says Dr. Jones. “So having no auxin may not be ideal for the shooting media used in Stages 1 and 2.” Auxin is a plant hormone that can help promote the elongation of cells, an important step in any plant’s growth. “And cytokinins are typically synthesized in the root and moves through xylem to shoots to regulate mitosis as well as inducing lateral bud branching, so again finding that nice balance between these two hormones is key.”

Acclimation & Hardening Off – Stage 4

“When plants have developed good looking healthy roots, it’s time to pop the top,” says Dr. Jones. This means opening the vessel, another risk for contamination, which is why having a clean environment is so crucial. “The location of these vessels needs to be tightly controlled for light, relative humidity, temperature and cleanliness.” In the culture, sugar is a main ingredient in the medium, because the growing explants are not very photosynthetically active. “By opening the lid of the vessel, carbon dioxide is introduced to the environment, which promotes and enhances photosynthesis, really getting the plants ready for cultivation.”

Harvesting explant material from mother plants

The very final step in tissue culture micropropagation is hardening, which involves the formation of the waxy cuticle on the leaves of the plant, according to Dr. Jones. This is what preps the plant to actually survive in an unsterile environment. “The rooted plants are removed from the culture vessel, the media washed off and placed in a potting mix/matrix or plug and kept in high humidity and low light,” says Dr. Jones. “Now that there is no sugar, contamination is no longer a threat, and these plants can be moved to the grow facility.” She says conditioning these plants can take one or two weeks. Over that time, growers should gradually increase light intensity and bring down the relative humidity to normal growing conditions.

Overall, this process, if done efficiently, can take roughly eleven weeks from prepping the explants to acclimation and hardening. If growers perform all the steps correctly and with extra care to reduce risks of contamination, one can produce thousands of plants in a matter of weeks.

In the fourth and final part of this series, we are going to dive into implementation. In that piece, we will discuss design principles for tissue culture facilities, equipment and instrumentation and some real-world case studies of tissue culture micropropagation.

Applications for Tissue Culture in Cannabis Growing: Part 2

By Aaron G. Biros
2 Comments

In the first part of this series, we introduced Dr. Hope Jones, who took her experience in tissue culture from NASA and brought it to the cannabis industry and C4 Laboratories. We discussed some of the essential concepts behind tissue culture and defined a few basic terms like micropropagation, totipotency, explants and cloning. Now let’s get into some of the issues with cloning from mother plants and the advantages that come with using tissue culture for propagating and cultivating cannabis.

Time & Resources

Dr. Hope Jones, chief scientific officer at C4 Labs

Taking cuttings from mother plants is arguably the most popular method of propagating cannabis plants. It is a process that requires significant real estate, resources and labor. “Moms can take up a great deal of space that is not contributing directly to production,” says Dr. Jones. “I know from experience that scaling up production and/or adding new strains to the production line requires significant time and resources to raise and maintain new healthy and productive mother plants.” Each mother plant produces a limited number of clones per harvest period and over the course of her life cycle.

By using tissue culture, a cultivator can generate an almost infinite number of clones from one plant cutting. With so many growers calculating their costs-per-square-foot, micropropagation is an effective tool to save space, labor and time, thus increasing profit margins. “Just to put it in perspective: Holly Scoggins’ book Plants From Test Tubes, cites a Day Lily cultivator who uses micropropagation to produce 1,000 plants in 30 square feet of shelf space each week,” says Dr. Jones. “Using conventional methods, one would need a half-acre to produce the same amount of plants.” Cultivators can produce a much greater number of plants-per-square-foot by using micropropagation effectively.

Damage from whiteflies, thrips and powdery mildew is all visible on this sick plant.

Early Health & Vigor

Most tissue culture methods use sterilized vessels that contain sugar-rich media to support growth of plantlets before they can photosynthesize on their own. “The media is prepped, poured into vessels, and placed in an autoclave (or pressure cooker) where it is subjected to high temps and pressure to achieve proper sterility.”

The sterile environment and rich growth media supplies plantlets with an abundance of everything they need. “When plantlets emerge from culture, they are pathogen-free, with a stockpile of food and nutrient reserves that support rapid growth and vigor, superior to conventional cuttings,” says Dr. Jones.

Stress & Disease

As any grower knows, mother plants can sometimes experience stress and disease. This might come in the form under or over-watering, heat stress, spider mites, whiteflies, mold and viruses. “Any stress or infection that a mother plant is subjected too can impact progeny health and productivity in a couple of ways,” says Dr. Jones.

Powdery mildew starts with white/grey spots seen on the upper leaves surface
Tobacco Mosaic Virus symptoms can include tip curling, blotching of leaf mosaic patterning, and stunting.

For example, diseases like powdery mildew and tobacco mosaic virus are often systemic, meaning that pathogens have spread to almost every tissue in the plant. Once infected, it is impossible to completely eliminate pathogens from tissues. Therefore any cuttings made from a diseased mother plant, even if they look perfectly healthy, will also be infected and can eventually present disease symptoms like reduced productivity and/or plant death, according to Dr. Jones.

How does tissue culture get around this problem? Remember that explants (small tissue samples used as starting material) can be extracted from any part of the plant. Meristematic cells in shoot tips and leaves are the source of new plant growth. Dr. Jones explains that these cells, and the first set of primordial leaves are not connected directly to the vascular tissue, the plant’s transport system by which pathogens spread. Therefore, meristematic cells tend to be disease-free, whatever the condition of the mother. It takes a sharp blade, a dissecting microscope, and a lot of experience to learn, but as Dr. Jones explains, “harvesting explants from meristems is a routine micropropagation technique used by ‘Big Horticulture.’ One example is the strawberry. Viruses and pathogens are so prevalent that the strawberry industry must use meristematic culture to ensure pathogen free progeny.”

Epigenetics

Now let’s talk about epigenetics. We know that plants don’t have the option of physically moving away from stress or predation. Instead, they have evolved sophisticated ways of changing their own biology to adapt to and/or protect themselves. “Consider what happens to a mom exposed to a pathogen. The infected plant will start expressing (turning on) genes and making proteins that contribute to pathogen resistance,” says Dr. Jones. “These changes to gene expression are partly regulated by epigenetic modifications, chemical changes to DNA that increase or decrease the likelihood a cell will express a particular gene, but that do not actually modify the gene itself. Like annotations to a piece of music, epigenetic modifications don’t change the notes but rather how loud or soft, quickly or slowly the notes are played.”

There are more than 1,000 different viruses and mixed infections are very common

This is where it gets interesting. “Epigenetic modifications can be systemic and long lived. Plants infected by a pathogen or stressed by drought will present widespread epigenetic modifications to their DNA,” says Dr. Jones. “For an annual plant like cannabis, those modifications are relatively permanent. Thus a cutting from a mom having drought or pathogen adapted epigenetic programming will inherit that modified DNA and behave as if it were experiencing that stress, whether present or not.”

In the wild, this adaptability is critical for plant survival and reproduction, but to a grower, this is a less-than-ideal scenario. “The epigenetic modifications allowed the mother to tolerate the stress, which is great from the perspective of survival and fitness, but it comes at a cost. Some of the finite energy and resources that usually support plant growth and reproduction are instead channeled to stress response,” says Dr. Jones. This trade off results in reduction in overall plant yield and quality. “Those epigenetic changes result in a new phenotype for that mother,” says Dr. Jones. “All cuttings from her will reflect the new phenotype. This is one major mechanism underlying what many in the cannabis industry (incorrectly) call ‘genetic drift,’ or the loss of vigor over successive clonal generations.”

This is again where tissue culture can be such a game changer. The process of dedifferentiation, as explained in part 1 of this series, can rejuvenate a “tired” mother plant by inducing a kind of reboot– clearing accumulated epigenetic modifications that negatively impact progeny vigor and productivity. In the third part of this series, we will discuss the five stages of micropropagation, detailing the process of how you can grow plantlets in tissue culture. Stay tuned for more!