Tag Archives: UV

The 3-Legged Stool of Successful Grow Operations: Climate, Cultivation & Genetics – Part 4

By Phil Gibson
No Comments

This is Part 4 in The 3-Legged Stool of Successful Grow Operations series. Click here to see Part 1, here to see Part 2, and here to see Part 3. Stay tuned for Part 5, coming next week.

Integrated Pest Management (IPM)

Aeroponic & hydroponic systems can operate with little to no soil or media. This eliminates the pest vectors that coco-coir, peat moss/perlite and organic media can harbor as part of their healthy biome approach. Liquid nutrient systems come at the nutrient approach from a different direction. Pure nutrient salts (nitrogen, potassium, magnesium and trace metals) are provided to the plant roots in a liquid carrier form. This sounds ideal for integrated pest management programs, but cultivators have to be aware of water and airborne pathogens that can disrupt operations. I will summarize some aspects to consider in today’s summary.

The elimination of soil media intrinsically helps a pest management program as it reduces the labor required to maintain a grow and the number of times the grow room doors are opened. Join that with effective automation with sensors and software, and you have immediate improvements in pest access. Sounds perfect, but we still have staff to maintain a facility and people become the number one source of contamination in a grow operation.
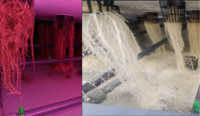
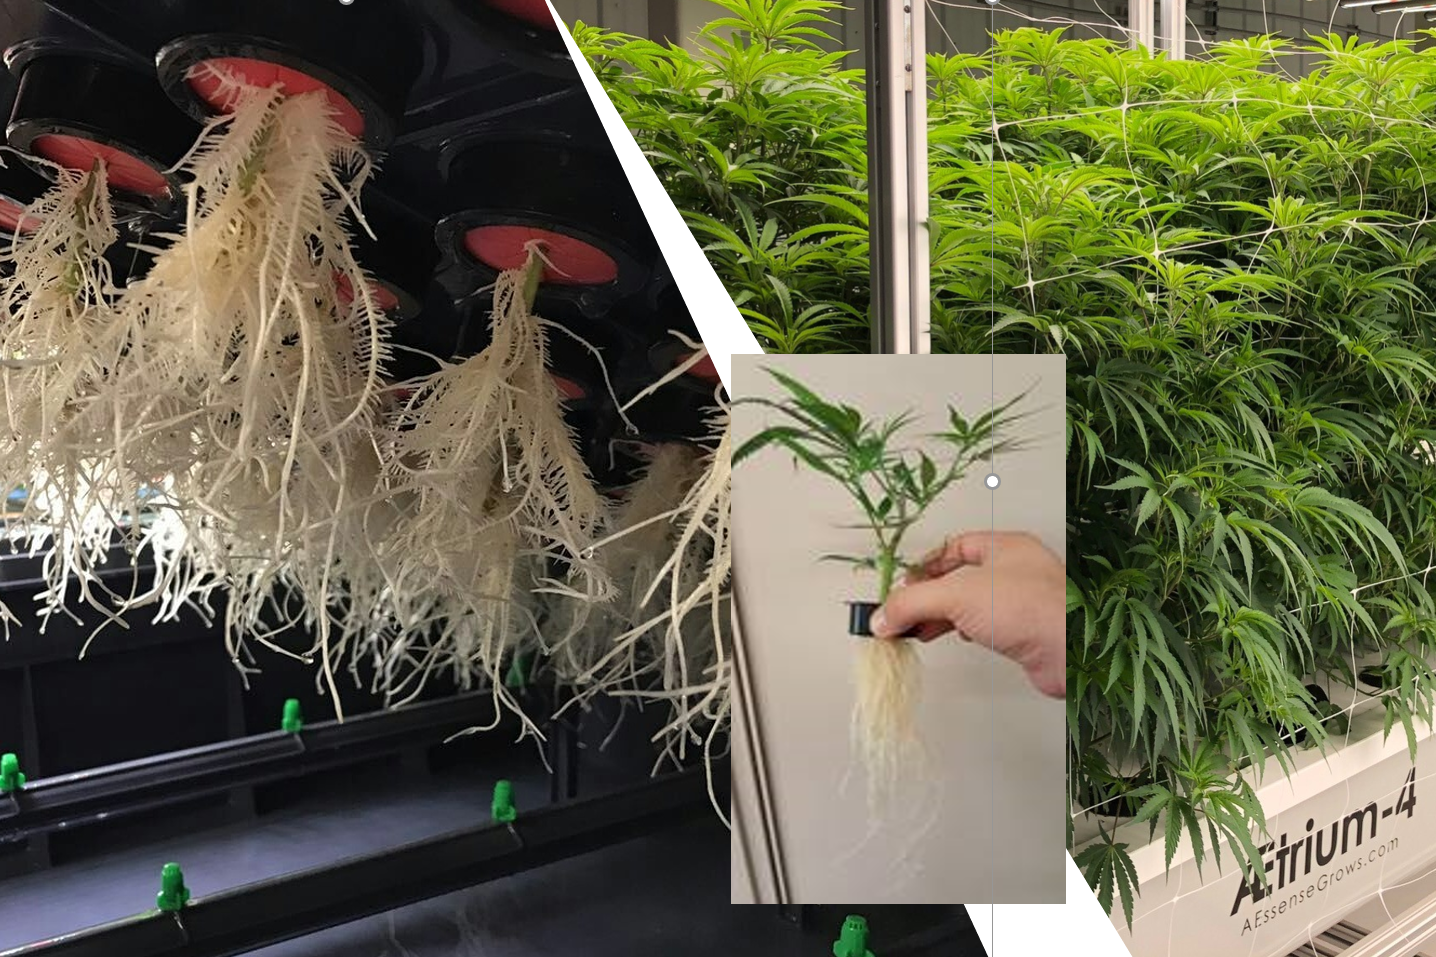
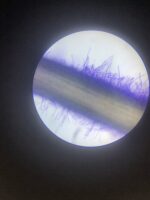
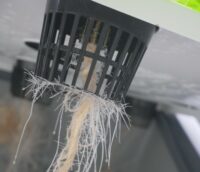
Figure 1: Example of Pythium Infected & Healthy Roots

Insects do damage directly to plants as they grow and procreate in a grow room. They also carry other pathogens that infect your plants. For example, root aphids, a very common problem, are a known carrier of the root pathogen, Pythium.

Procedures

One of the most common ways for pests to access your sealed, sterile, perfectly managed facilities are in the root stock of outsourced clones. If you must start your grow cycles with externally sourced clones, it is strongly recommended that you quarantine those clones to make sure that they do not import pest production facilities into your operation. Your operation management procedures must be complete. If you take cuttings from an internal nursery of mother plants, any pathogens present in your mother room will migrate through cuttings into your clones, supply lines, and subsequently, flower rooms.

Figure 2: Healthy Mothers & Clones, Onyx Agronomics

Start your gating process with questioning your employees and visitors. Do they grow at home or have they been to another grow operation in the last week? In the last day? You may be surprised by how many people that gain access to your grow will answer these questions in the affirmative.

Developing standard operating procedures (SOPs) that are followed by every employee and every visitor will significantly reduce your pest access and infection rates, and hence, increase your healthy harvests and increase your profitability. Procedures should include clothing, quarantining new genetics and cleaning procedures, such as baking or irradiating rooms to guarantee you begin with a sterile facility. This is covered more in the complete white paper.

Engineering Controls

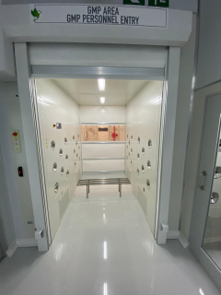
Figure 3: Access Control: Air Shower, FarmaGrowers

Technology is a wonderful thing but no replacement for regimented procedures. Considered a best practice, professional air showers, that bar access to internal facilities, provide an aggressive barrier for physical pests. These high velocity fan systems and exhaust methods blow off insects, pollen and debris before they proceed into your facility. From that access port into your grow space, positive air flow pressure should increase from the grow rooms, to the hallways, to the outside of your grow spaces. This positive airflow will always be pushing insects and airborne material out of your grow space and away from your plants.

Maintaining Oxidation Reduction Potential (ORP)

ORP is a relative measurement of water health. Perfect water is clear of all material, both inert and with life. Reverse osmosis (RO) is a standard way to clear water but it is not sufficient in removing microscopic biological organisms. UV and chemical methods are needed in addition to RO to clear water completely.

ORP is an electronic measurement in millivolts (mV) that represents the ability of a chemical substance to oxidize another substance. ORP meters are a developing area and when using a meter, it is important to track the change in ORP values rather than the absolute number. This is due to various methods that the different meters use to calculate the ORP values. More on this in the white paper.

Oxidizers

Figure 4: AEssenseGrows Aeroponic Nozzles

There are two significant ways to adjust the ORP of a fertilizer/irrigation (fertigation) solution. The first is by adding oxidizers. Examples are chemical oxidizers like hydrogen peroxide (H2O2), hypochlorous acid (HOCl), ozone (O3) and chlorine dioxide (ClO2). Adding these to a fertigation solution increases the ORP of the fertigation solution by oxidizing materials and organic matter. The key is to kill off the bad things and not affect the growth of plants. Again here, the absolute ORP metric is not the deciding factor in the health of a solution and the methods by which each chemical reaction occurs for each of these chemicals are different. This is compounded by the fact that different ORP meters will show different readings for the same solution.

Another wonderful thing about automation and aeroponic and hydroponic dosing systems is that they can automatically maintain oxidizing rates and our white papers explain the methods executed by today’s automation systems.

Water Chilling

Another way to adjust ORP is to reduce the water temperature of the reservoirs. Maintaining water temperature below the overall temperature of your grow rooms is imperative for minimal biological deposition and nutrient system health. Water chillers use a heat exchanger process to export heat from liquid nutrient dosing reservoirs and maintain desired temperatures.

The benefit of managing ORP in aeroponic and hydroponic grow systems is highly accelerated growth. This is enhanced in aeroponics due to the effectively infinite oxygen exchanging gases at the surface of the plant roots. Nutrient droplets are sprayed or vaporized in parallel and provided to these root surfaces. Maximizing the timing and the best mineral nutrients to the root combustion is the art of grow recipe development. Great recipes drive superior yields and when combined with superior genetics and solid environmental controls, these plants will deliver spectacular profits to a grow operation.

Another Hero Award

Before closing this chapter, we have many cultivators that are producing stellar results with their operational and IPM procedures, so it is hard to choose just one leader. That said, our hats are off to RAIR Systems again and their director of cultivation, Ashley Hubbard. She and her team are determined to be successful and drive pests out of their operations with positive “little critters” and the best water treatment and management that we have seen. You are welcome to view the 7-episode walkthrough of the RAIR facility and their procedures here.

To download the complete guide and get to the beef quickly, please request the complete white paper Top Quality Cultivation Facilities here.

Stay tuned for Part 5 coming next week where we’ll discuss Genetics.

The 3-Legged Stool of Successful Grow Operations: Climate, Cultivation & Genetics – Part 2

By Phil Gibson
No Comments

This is Part 2 in The 3-Legged Stool of Successful Grow Operations series. Click here to read Part 1 and stay tuned for Part 3 coming next week.

Aeroponic and hydroponic systems use zero-soil, so water is effectively our media and our transport mechanism for nutrition. Ideally, you start with clean, fresh water with “nothing” in it. Nothing in this case means no heavy metals, pesticides, bacteria or pathogens. There are some scary words in there so let’s talk through the best ways to get to “nothing.”

The first place to start is by testing your source water, whether it is surface, well or municipal water. This will give you an initial idea of how “empty” your water is. Water supplies shift over time, so it is also a very important input to monitor over time with annual or bi-annual testing. Clean water is the essence of success for aeroponics and a great way to lower your cost of production. With proper design and management, you can recycle and reuse 95%+ of the water you draw into your facility.

Reverse Osmosis (RO)

Mothers to clones: Happy clones, it’s all about the water

RO is the most common way to clear your incoming water. The process uses pressure filtration by forcing your water through a series of filters or meshes that block or extract large particles, organics and metals. Normally this is 98%-99% efficient. These systems do require attention and maintenance as they do have filters that are required to be changed regularly depending on the clarity of your original water source and the type of material filtered. This accomplishes a lot of your water clearing process to empty the balloon, but it does not clear the pesky biologicals or pathogens. RO is covered in detail in our “You are what you drink” webinar so look that over for a deeper explanation. There are a wide range of relatively low-cost suppliers based on capacity and filtration efficiency. From an operations standpoint, the key is to understand the filter replacement cycle and cost of replacement.

Ultraviolet Light (UV)

UV light can be used to clear organics and pathogens from water. The primary use is to clear origin water but it is also especially important for recovered water that you save from the humidity in your grow rooms. More on this below. One has to be cautious about the use of UV light. It will cause sunburn and eye damage with exposure so handle this resource with care. After RO & UV treatment, input water should be an empty balloon ready for the addition of your perfect nutrient salt recipe. There are a wide range of low-cost UV lighting solution suppliers from which to choose and they are easy to find.

Dehumidification & Recovery (DEHU)

Early root follicles: Reaching for first nutrients

The number one way to conserve water in an accelerated growth aeroponic grow room is to recapture the humidity that is transpired into the air as the plants grow. While DEHU water is effectively distilled water (or clear of particulates), it can be full of healthy little bacteria or pathogens than may be transported through air or residing in the equipment filters. Clearing these with UV light normally makes this water directly reusable in your fertigation systems. Not all dehumidifiers are perfect. Some metals used in their construction can leach into the recovered water, so this is worth a deeper look as you create your complete water system. Air treatment suppliers are covered in Part 1 of this series.

Used Fertigation Water, or “Flush”

At the start of the flower cycle, take your clean water (the empty balloon) and add your perfect nutrient salt flower recipe and deliver it to your plants. Over the grow cycle from flower to harvest, your plants will use portions of your nutrients and your balloon contents will drift from your target recipe you’re your desired cycle, clear or flush your reservoirs and reset your recipe by refilling your balloon to your exact targets. The exiting nutrient-rich “flush” water can also be recycled into your source water feed since the salts and metals present can be cleared from the mixture through the same RO process that your source water goes through. The end result is perfectly good recycled water savings.

Oxygen Reduction Potential (ORP)

Healthy roots reach for water: Early veg when plants get rolling

ORP is a measurement of an oxidizing agent. Oxidizing solutions are a common and inexpensive method of disinfecting water before and during use in hydroponic systems. Oxidizers can be used to monitor and deal with the “cleanliness” of a nutrient water solution while it is in use. Several oxidizing agents exist with the most common being: hydrogen peroxide, chlorine, ozone and chlorine dioxide. The characteristics of each of these agents and how they interact with the organic matter in solutions is different. The ideal concentrations to use in each situation to kill or control pathogens is unique and one of the topics covered by our “Letters from the AEssenseGrows plant science team” on our website. That deep dive is the subject of another paper.

When you take all of these subjects together and they are done right, you should be able to recycle 95% of your source water with a professional water treatment & recycling system.

Here, I would like highlight the ultimate water hero: Ashley Hubbard, director of cultivation at RAIR Cannabis. For a quick tour of her water treatment and recovery room, see here. No one that I know manages water better than RAIR Cannabis and Ashley leads the team there.

To download the complete guide and get to the beef quickly, please request the complete white paper Top Quality Cultivation Facilities here.

Stay tuned for Part 3 coming next week where we’ll discuss The Right Build Out.

dry cannabis plants

How to Grow Cannabis Plants for Concentrate Production

By Andrew Myers
No Comments
dry cannabis plants

While flower is still the most popular way to consume cannabis, the concentrates market is booming. Some predict concentrates will be nearly as popular as flower by 2022, with an estimated $8.5 billion in retail sales. That’s a lot of concentrates and, chances are, cannabis producers are already feeling the pressure to keep up.

Concentrates refer to products made from processing cannabis – often resulting in much higher THC or CBD percentages. The category includes oils, wax, dabs, shatter, live resin and hash. Consumers are increasingly drawn to these cannabis products for their near-immediate and intense effects. They’re often consumed through vaporization, dabbing or sublingual absorption and are sometimes favored by those who want to avoid smoking. Cannabis growers who have traditionally focused on flower yields may decide to prioritize quality and potency levels in order to tap into these changing consumer tastes.

What Growers Should Focus on to Produce High Quality Concentrates
We’ll let you in on a little secret: making good concentrates starts with good flower. If you’re starting with low-quality flower, it’s impossible to create a high-quality concentrate. Whatever qualities inherent to the flower you’re starting with will be amplified post-processing. So, really, the concentrate-making process starts at the seedling level, requiring the right care and attention to coax out the results you’re looking for.

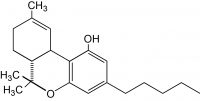
Tetrahydrocannabinol (THC), just one of hundreds of cannabinoids found in cannabis.

But what makes good flower? While this can be a subjective question, those producing concentrates generally look for flowers with big, abundant trichomes. Trichomes are the small, dewy structures found across the cannabis plant on buds, leaves and even the stem. They’re responsible for producing the plant’s cannabinoids and terpenes – the chemical compounds that give a strain its unique benefits, aroma and taste. Evolutionarily, trichomes attract pollinators, deter hungry herbivores and provide some defense against wind, cold and UV radiation.

Generally, trichomes indicate how potent the flower is. Plus, what we’re most often looking for when making concentrates is higher cannabinoid and terpene profiles, while also ensuring absolute safety.

What measures can growers take to produce crops that are ideal for concentrate production? Start with the following:

Avoiding Contaminants
Just like you would wash your fruits and vegetables before consumption, consumers want to be sure there’s no dangerous residuals in the concentrate they are ingesting. Growers can avoid any post-process residuals by taking a few key steps, including:

  • Photo: Michelle Tribe, Flickr

    Cutting out the pesticides. Any pesticides that are on your flowers before they go through processing will show up in your concentrates, often even more – you guessed it – concentrated. This is a serious health concern for consumers who might be sensitive to certain chemicals or have compromised immune systems. It’s dangerous to healthy consumers, too. Rather than spraying hazardous chemicals, growers could consider integrated pest management techniques, such as releasing predatory insects.

  • Limiting foliar spraying. Some growers will use foliar spraying to address nutrient deficiency or pest-related issues through delivering nutrients straight to the leaves. However, this can also result in contaminated concentrates. If you really need to spray, do it during the vegetative stage or investigate organic options.
  • Taking the time to flush the crop. This is a critical step in reducing potential contaminants in your concentrate, especially if you’re using a non-organic nutrient solution or fertilizer. Flushing simply means only giving your plants water during the final two weeks of flowering before harvest, resulting in a cleaner, non-contaminated flower and therefore a cleaner concentrate.

Perfecting the Indoor Environment
When cultivating cannabis indoors, growers are given ultimate control over their crop. They control how much light the plants receive, the lighting schedule, temperature and humidity levels. Creating the ideal environment for your cannabis crop is the number one way to ensure healthy plants and quality concentrates. There are many factors to consider when maintaining an indoor grow:

  • Temperature regulation. Trichomes are sensitive to temperature changes and start to degrade if they’re too hot or too cold. To maintain the best trichome structure, you’ll want to maintain an ideal temperature – for most strains, this falls between an idyllic 68 and 77 degrees.
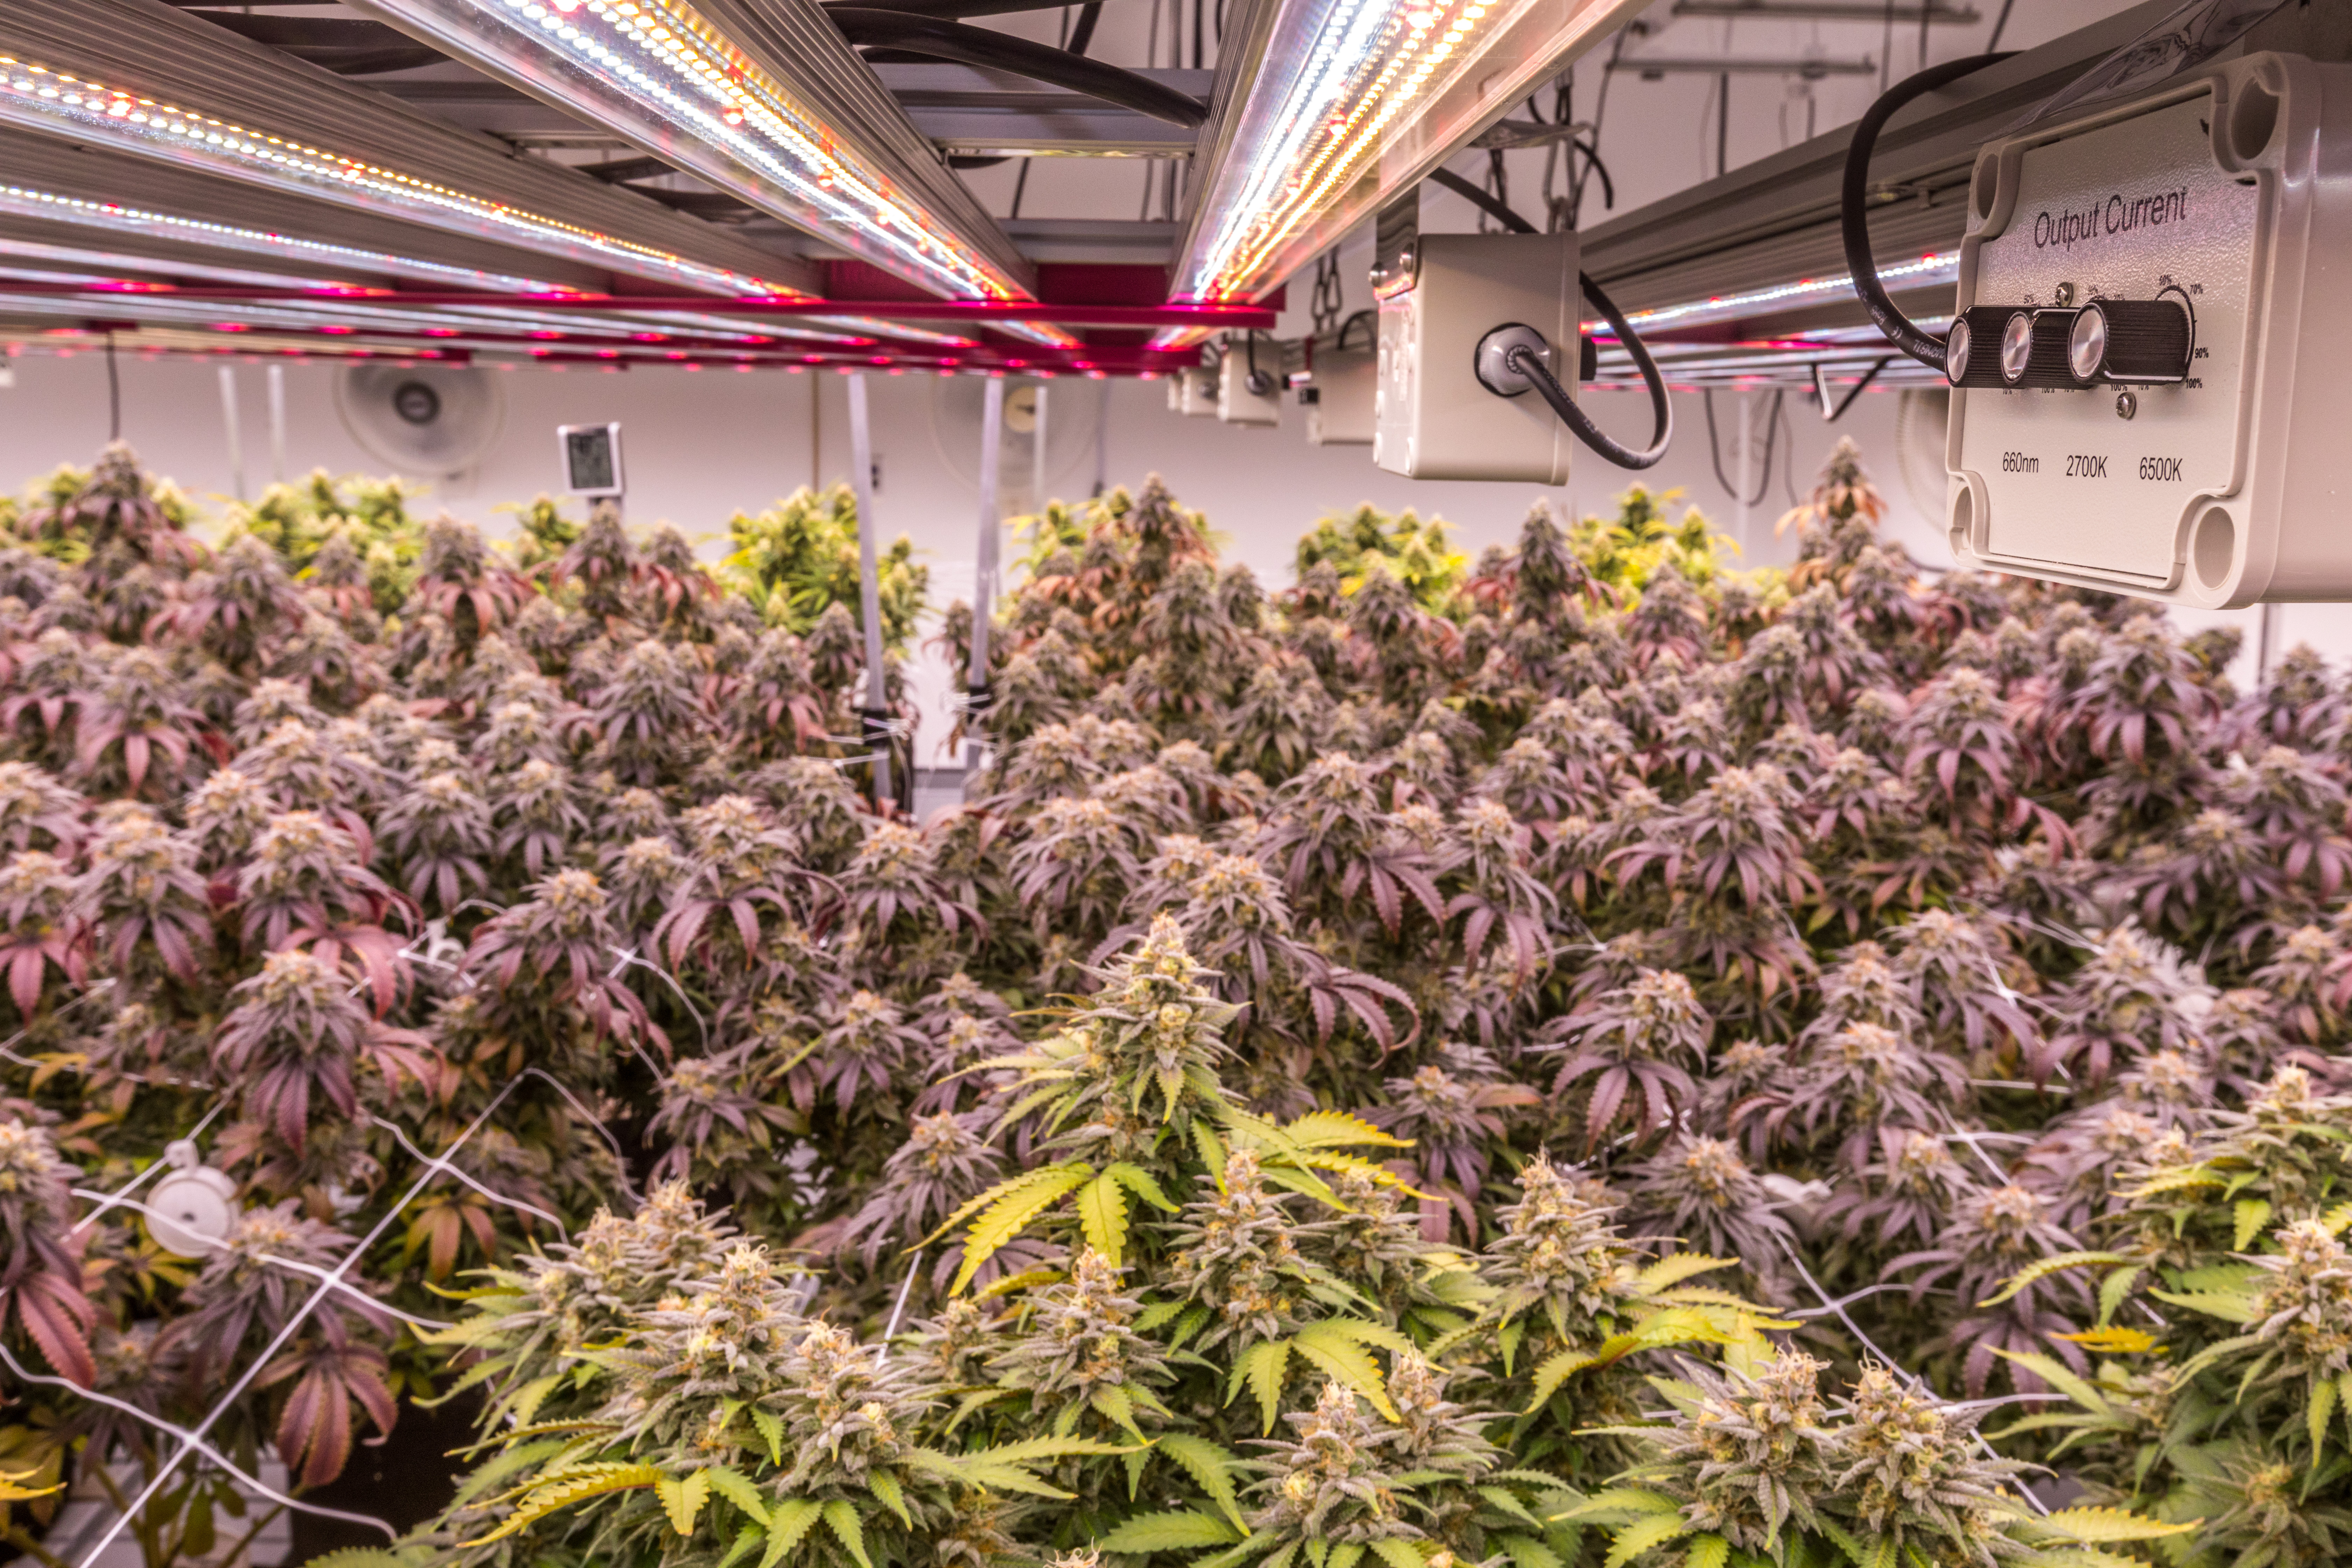
  • Adequate light. For plants to perform photosynthesis indoors, they’ll need an appropriate light source – preferably one that is full-spectrum. Full-spectrum LEDs are able to closely replicate the sun and provide ample, uniform light to your crop. Another selling point for LEDs is their low heat output, making it much easier for growers to regulate ambient heat.

    dry cannabis plants
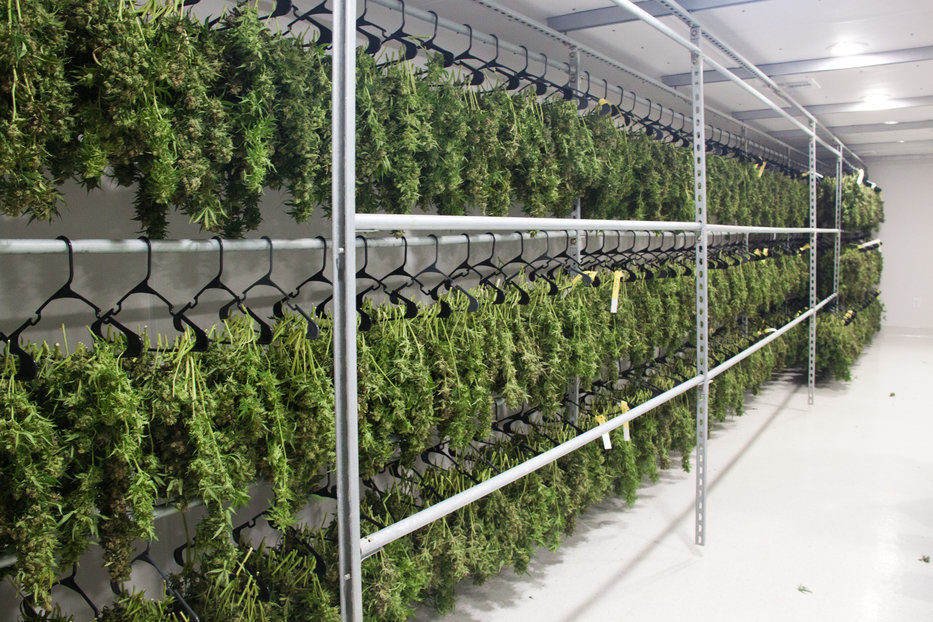
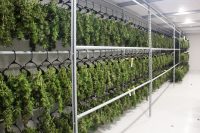
    Rows of cannabis plants drying and curing following harvest
  • CO2. Another necessary ingredient for photosynthesis is CO2. Providing your indoor crops with CO2 can boost plant size and yields and, therefore, provides more surface area for trichomes to develop and thrive.
  • Cold snap prior to harvest. Some growers rely on this age-old tactic for one last push before harvest – lowering their temperature for a few days right at the end of the flower cycle. They believe this puts the plants into a defense mode and will produce more trichomes in order to protect themselves.

Following Best Practices Post-Harvest
You made it to harvest – you’re almost done!

When harvesting and storing your plants, handle them with care to reduce damage to trichomes. If you’re planning on immediately making concentrates, you can move forward to the drying and curing process. If you’re going to wait a few weeks before processing, freeze your plants. This will preserve the cannabinoid and terpene profiles at their peak.

As the cannabis industry continues to expand, more consumers are likely to reach for concentrates at their local dispensaries. It makes sense that businesses want to diversify their offerings to satisfy customers looking for the most effective way to consume cannabis. As with any cannabis-derived product, producers will want to prioritize quality and safety – especially in the concentrate market.

Beyond THC: Encouraging Cannabinoid and Terpene Production with LEDs

By Andrew Myers
No Comments

For years, tetrahydrocannabinol (THC) got all the attention. While THC certainly delivers its own benefits (such as relaxation and pain relief), there’s a whole host of other – and often overlooked – compounds found in cannabis with important benefits as well. THC is truly only the tip of the iceberg when it comes to cannabis’s potential.

As the cannabis industry evolves with changing consumer tastes and developing medical research, growers may employ techniques to boost cannabinoid and terpene profiles in their harvests – beyond merely focusing on THC. Advanced LEDs allow growers to elicit specific biological responses in cannabis crops, including increased concentrations of these naturally occurring chemical compounds.

The Foundation of Cannabis’s Effects
Whether used medicinally or otherwise, cannabis has changed our society and many of our lives – and there’s a collection of naturally occurring chemical compounds, known as cannabinoids and terpenes, to thank.

  • The cannabinoids THC and CBD are the most common and well-researched, however they are accompanied by more than 200 additional compounds, including cannabinol (CBN), cannabigerol (CBG) and tetrahydrocannabivarin (THCV), among others.
  • The cannabis plant also contains terpenes. These structures are responsible for giving flowers (including cannabis), fruits and spices their distinctive flavors and aromas. Common terpenes include limonene, linalool, pinene and myrcene.

Both cannabinoids and terpenes are found in the cannabis plant’s glandular structures known as trichomes. Look closely, and you’ll notice trichomes coating the cannabis flowers and leaves, giving the plant an almost frosty appearance.

macropistil/trichome
A macro view of the trichomes and pistils on the plant

Trichomes – which are found across several plant species – are a key aspect of a cannabis plant’s survival. The specific combination of metabolites produced by trichomes may attract certain pollinators and repel plant-eating animals. Moreover, trichomes (and specifically THC) may act as the plant’s form of sunscreen and shield the plant from harmful ultraviolet rays.

While they play an essential part in the cannabis plant’s lifecycle, trichomes are volatile and easily influenced by a range of environmental factors, including light, heat, physical agitation and time. Therefore, environment is a defining variable in the development of these important structures.

How LEDs Support Cannabinoid and Terpene Development in Crops
Spectrally tunable LEDs give indoor cannabis growers unparalleled control over their crops. As research has expanded about plants’ responses to the light spectrum, growers have discovered they are able to elicit certain physiological responses in the plant. This phenomenon is called photomorphogenesis. At its root, photomorphogenesis is a survival tactic – it’s how the plant responds to miniscule changes in its environment to increase the chances of reaching full maturity and, eventually, reproducing. While cultivated cannabis plants won’t reproduce at an indoor setting, growers can still use the light spectrum to encourage strong root and stem development, hasten the flowering process and the development of bigger, brightly colored flowers.

It makes sense that using the proper light spectrums may also have an impact on the production of specific cannabinoids and terpenes – an important factor when responding to highly specific consumer needs and desires, both within medical and adult-use markets.

Here are a few more reasons why utilizing full-spectrum LEDs can lead to higher quality cannabis:

  • Lower Heat, but the Same Intensity.
    When compared to HPS, fluorescent and other conventional lighting technologies, LEDs have a much lower heat output, but provide the same level of intensity (and often improved uniformity). This represents an enormous advantage for cannabis cultivators, as the lights can be hung much closer to the plant canopy without burning trichomes than they would be able to with other lighting technologies.
  • UV Light. Cannabinoids and terpenes are part of the cannabis plant’s natural defense mechanism, so it makes sense that lightly stressing plants can boost cannabinoid and terpene numbers. Some studies illustrate an increase in UV-B and UV-A light can lead to richer cannabinoid and terpene profiles.1 It’s a fine line to walk, though – too much UV can result in burned plants, which leads to a noticeable drop in cannabinoids.
  • Full-Spectrum Capabilities. The cannabis plant evolved over millions of years under the steady and reliable light of the sun. Full-spectrum is the closest thing to natural sunlight that growers will be able to find for indoor growing – and they’ve been shown to perform better in terms of cannabinoid development. A 2018 study titled “The Effect of Light Spectrum on the Morphology and Cannabinoid Content for Cannabis Sativa L.,” explored how an optimized light spectrum resulted in increased expression of cannabinoids CBG and THCV.2

This is the most important tip for indoor growers: your plants’ environment is everything. It can make or break a successful harvest. That means cultivators are responsible for ensuring the plants are kept in ideal conditions. Lights are certainly important at an indoor facility, but there are several other factors to consider that can affect your lights’ performance and the potency of your final product. This includes your temperature regulation, humidity, the density of plants within the space, CO2 concentration and many other variables. For the best results, your lights should be fully aligned with other environmental controls in your space. Nothing sabotages a once-promising crop like recurrent issues in the indoor environment.

solsticegrowop_feb
Indoor cultivation facilities often use high powered lights that can give off heat

Cannabinoids and terpenes take time to develop – so cultivators will want to avoid harvesting their plants too early. On the other hand, these compounds begin to degrade over time, so growers can’t wait too long either.

Cultivators seeking potent cannabinoid and terpene profiles must find a happy medium for the best results – and the best place to look is where cannabinoids and terpenes develop: the trichomes. With a microscope, cultivators can get up close and personal with these sparkly structures. Younger plants begin with clear trichomes, which eventually become opaque and change to amber. Once your plants show amber-hued trichomes, they’re ready for harvest.

The truth here is that there’s no perfect formula to elicit show-stopping cannabinoids and dizzying terpenes with every harvest. A lot of cannabis cultivation is based around trial-and-error, finding what works for your space, your business and your team. But understanding the basics around indoor environmental controls like lighting and temperature – and how they can affect the development of cannabinoids and terpenes – is an excellent place to start. Using high quality equipment, such as full-spectrum LED lighting can boost both cannabinoid and terpene production, resulting in richer, more potent and higher quality strains.


References:

  1. Lyndon, John, Teramura, Alan H., Coffman, Benjamin C. “UV-B Radiation Effects on Photosynthesis, Growth and Cannabinoid Production of Two Cannabis Sativa Chemotypes.” August 1987. Photochemistry and photobiology. Web. https://onlinelibrary.wiley.com/doi/abs/10.1111/j.1751-1097.1987.tb04757.x?&sid=nlm%3Apubmed
  2. Magagnini G., Grassi G., Kotiranta, S. “The Effect of Light Spectrum on the Morphology and Cannabinoid Content of Cannabis sativa L.” 2018. Medical Cannabis and Cannabinoids. Web: https://www.karger.com/Article/FullText/489030

Keeping Your Environment Clean: Preventative Measures Against Contamination

By Jeff Scheir
2 Comments

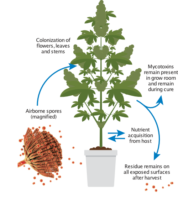
For years we have heard about and sometimes experienced, white powdery mildew when growing cannabis. It is a problem we can see, and we have numerous ways to combat it. But now more and more states are introducing regulatory testing on our harvests and they are looking for harmful substances like Escherichia coli., Aspergillis Fumigatus, Aspergillis terreus, …  just to name a few. Mycotoxins, mold and bacteria can render a harvest unusable and even unsellable- and you can’t see these problems with the naked eye. How much would it cost you to have to throw away an entire crop?

You bring in equipment to control the humidity. You treat the soil and create just the right amount of light to grow a superior product. You secure and protect the growing, harvesting, drying and production areas of your facility. You do everything you can to secure a superior yield… but do you?

Many of the organisms that can hurt our harvest are being multiplied, concentrated and introduced to the plants by the very equipment we use to control the growing environment. This happens inherently in HVAC equipment.

Your air conditioning equipment cools the air circulating around your harvest in a process that pulls moisture from the air and creates a perfect breeding ground in the wet cooling coil for growth of many of the organisms that can destroy your yield. As these organisms multiply and concentrate in the HVAC system, they then spew out into the very environment you are trying to protect at concentrated levels far greater than outside air. In effect, you are inoculating the very plants you need to keep safe from these toxins if you want to sell your product.

The cannabis industry is starting to take a page from the healthcare and food safety industries who have discovered the best way to mitigate these dangers is the installation of a proper UVC solution inside their air conditioning equipment.

Why? How does UVC help? What is UVC?

What is Ultraviolet?

Ultraviolet (UV) light is one form of electromagnetic energy produced naturally by the sun. UV is a spectrum of light just below the visible light and it is split into four distinct spectral areas – Vacuum UV or UVV (100 to 200 nm), UVC (200 to 280 nm), UVB (280 to 315 nm) and UVA (315 to 400 nm). UVA & UVB have been used in the industry to help promote growth of cannabis.

What is UVC (Ultraviolet C)?

The entire UV spectrum can kill or inactivate many microorganism species, preventing them from replicating. UVC energy at 253.7 nanometers provides the most germicidal effect. The application of UVC energy to inactivate microorganisms is also known as Germicidal Irradiation or UVGI.

UVC exposure inactivates microbial organisms such as mold, bacteria and viruses by altering the structure and the molecular bonds of their DNA (deoxyribonucleic acid). DNA is a “blue print” these organisms use to develop, function and reproduce. By destroying the organism’s ability to reproduce, it becomes harmless since it cannot colonize. After UVC exposure, the organism dies off leaving no offspring, and the population of the microorganism diminishes rapidly.

Ultraviolet germicidal lamps provide a much more powerful and concentrated effect of ultraviolet energy than can be found naturally. Germicidal UV provides a highly effective method of destroying microorganisms.

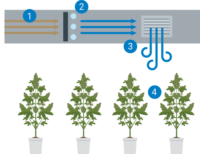
To better understand how Steril-Aire UVC works, it is important to understand the recommended design. Directed at a cooling coil and drain pan, UVC energy destroys surface biofilm, a gluey matrix of microorganisms that grows in the presence of moisture. Biofilm is prevalent in HVAC systems and leads to a host of indoor air quality (IAQ) and HVAC operational problems. UVC also destroys airborne viruses and bacteria that circulate through an HVAC system and feed out onto the crop. HVAC cooling coils are the largest reservoir and amplification device for microorganisms in any facility.

For the most effective microbial control, UV germicidal Emitters are installed on the supply side of the system, downstream from the cooling coil and above the drain pan. This location provides more effective biofilm and microbial control than in-duct UVC installations. By irradiating the contaminants at the source – the cooling coils and drain pans – UVC delivers simultaneous cleaning of surface microorganisms as well as destruction of airborne microorganisms and mycotoxins. Steril-Aire patented this installation configuration in 1998.

The recirculating air in HVAC systems create redundancy in exposing microorganisms and mycotoxins to UVC, ensuring multiple passes so the light energy is effective against large quantities of airborne mycotoxins and cleaning the air your plants live by.

Where are these mycotoxins coming from?

Aspergillus favors environments with ample oxygen and moisture. Most pre-harvest strategies to prevent these mycotoxins involve chemical treatment and are therefore not ideal for the cannabis industry.

Despite the lack of cannabis protocols and guidelines for reducing mycotoxin contamination, there are some basic practices that can be utilized from other agricultural groups that will help avoid the production of aflatoxins and ochratoxins.

When guidelines are applied correctly to the cannabis industry, the threat of aflatoxin and ochratoxin contamination can be significantly reduced. The place to start is a clean air environment.

Design to win

The design of indoor grow rooms for cannabis is critical to the control of airborne fungal spores and although most existing greenhouses allow for the ingress of fungal spores, experience has shown that they can be retrofitted with air filters, fans, and UVC systems to make them relatively free of these spores. Proper designs have shown clearly that:

  1. Prevention via air and surface disinfection using germicidal UVC is much better than chemical spot treatment on the surface of plants
  2. High levels of air changes per hour enhance UVC system performance in reducing airborne spores
  3. Cooling coil inner surfaces are a hidden reservoir of spores, a fertile breeding ground and constitute an ecosystem for a wide variety of molds. Continuous UVC surface decontamination of all coils should be the first system to be installed in greenhouses to reduce mildew outbreaks.

UVC can virtually eliminate airborne contaminants

Steril-Aire graphic 4

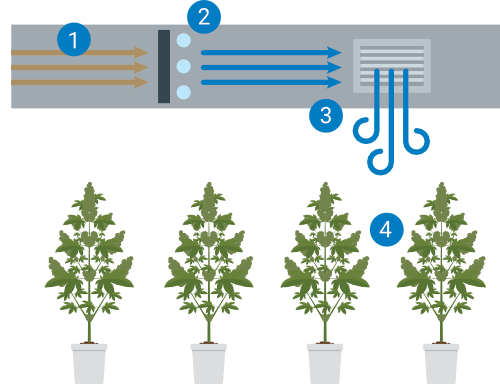
Steril-Aire was the first and is the market leader in using UVC light to eliminate mold and spores to ensure your product will not be ruined or test positive.

  1. Mold and spores grow in your air handler and are present in air entering your HVAC system.
  2. Steril-Aire UVC system installs quickly and easily in your existing system.
  3. The Steril-Aire UVC system destroys up to 99.999% of mold/spores.
  4. Plants are less likely to be affected by mold…with a low cost and no down time solution.

It’s time to protect your harvest before it gets sick. It’s time to be confident your yield will not test positive for the contaminants that will render it unusable. It’s time to win the testing battle. It’s time for a proper UVC solution to be incorporated throughout your facilities.