In the first part of this series, we introduced some relevant terms and principles to tissue culture micropropagation and reviewed Dr. Hope Jones’ background in the science of it. In the second part, we went into the advantages and disadvantages of using mother plants to clone and why tissue culture could help growers scale up. In the third part of this series, we are going to examine the five steps that Dr. Jones lays out to successfully micropropagate cannabis plants from tissue cultures.
Cleaning – Stage 0

Micropropagation includes 5 stages. “Stage 0 is the preparation of mother plants and harvest of cuttings for the explant material,” says Dr. Jones. “To ensure the best chance of growing well in culture, those ladies [the mom’s] should be cleaned up and at their best. And hopefully not stressed by insects or pathogens.” She says growers should also make sure the plants are properly fertilized and watered before harvesting explants. “Obtaining the explants is done with a clean technique using new disposable blades and gloves,” says Dr. Jones. “Young shoot tips are harvested and placed in labeled, large Ziploc bags with a small amount of dilute bleach and surfactant solution, then placed in a cooler and taken to the lab.” This is a process that could be documented with record keeping and data logs to ensure the same care is taken for every explant. “Once in the lab, working in the sterile environment of the transfer hood, the cuttings are sterilized, typically with bleach and a little surfactant, and then rinsed several times with sterile water,” says Dr. Jones. Once they reach the sterile environment, Dr. Jones removes the leaves and cuts the stem down to individual nodes.
Establishment – Stage 1
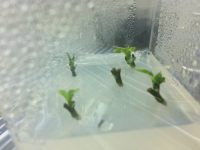
Establishment essentially means waiting for the shoots to develop. Establishing the culture requires an absolutely sterile environment, which is why the first step is so important. “Proper explant disinfection is equally as important is the control parameters of the facility itself,” says Dr. Jones. Mother plants are not grown in sterile facilities, but in an environment that is invariably contaminated with dust, which harbors micro-organisms, insects and other potential sources of contamination, including human handling. We discussed some of this in Part 2.
Explants, once sterilized and placed in the culture vessel, must establish to the new aseptic conditions. “Basically Stage 0 ends when the explants are cleaned and placed in the vessel. Stage 1 begins on the shelf while we patiently sit, watch and wait for the shoot growth,” says Dr. Jones. “Successful establishment means we properly disinfected the explants because the cultures do not become contaminated with bacteria or fungi and new shoot growth emerges.”
Multiplication – Stage 2
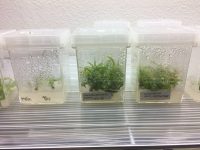
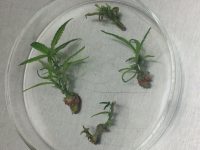
This stage is rather self-explanatory as multiplication simplified means generating many more shoots per explant. In order to create a large number of plants needed for meeting the demand of weekly clone orders, Dr. Jones can break up, or subculture, one explant that contains multiple numerous new shoots. “Let’s say one vessel, which originally started with 4 explants each developed four new shoots. Working in the hood, I remove each explant from the vessel and place it on a sterile petri dish. Now I can divide each explant into 4 new explants and then place the four new explant cuttings into their own vessel. In this example, we started with one vessel with 4 explants,” says Dr. Jones. “Which when subcultured 4-6 weeks later, we now have 4 vessels with 16 plants.” This is instrumental in understanding how tissue culture micropropagation can help growers scale without the need for a ton of space and maintenance. From a single explant, you can potentially generate 70,000 plants after 48 weeks, according to Dr. Jones. “Starting with not 1, but 10 or 20 explants would significantly speed up multiplication.” Using tissue culture effectively, one can see how a grower can exponentially increase their production.
Rooting – Stage 3
“When the decision is made to move cultures to the rooting stage, we typically need to subculture the plantlets to a different media formulated to induce rooting,” says Dr. Jones. “In some instances, the media is very dark, and that’s because of the addition of activated charcoal.” Using activated charcoal, according to Dr. Jones, helps darken the rooting environment, which closely mimics a normal rooting environment. “It helps remove high levels of cytokinin and other possible inhibitory compounds,” says Dr. Jones. Cytokinins are a type of plant growth hormone commonly used to promote healthy shoot growth, but it is important to make sure the culture contains the right ratio of hormones, including cytokinin and auxin for maximum root and shoot development. Dr. Jones suggests that growers research their own media formulation to ensure nice, healthy roots develop and that no tissue dies in the process. “With everything I grow in culture, when it comes to media, in any stage and with all new strains, I run some simple experiments in order to refine the media used,” says Dr. Jones. She puts a special focus on the concentrations and ratios of plant hormones in formulating her medias.
“We commonly think of auxin’s role in rooting, but it’s also important in leaves and acts as a regulator of apical shoot dominance,” says Dr. Jones. “So having no auxin may not be ideal for the shooting media used in Stages 1 and 2.” Auxin is a plant hormone that can help promote the elongation of cells, an important step in any plant’s growth. “And cytokinins are typically synthesized in the root and moves through xylem to shoots to regulate mitosis as well as inducing lateral bud branching, so again finding that nice balance between these two hormones is key.”
Acclimation & Hardening Off – Stage 4
“When plants have developed good looking healthy roots, it’s time to pop the top,” says Dr. Jones. This means opening the vessel, another risk for contamination, which is why having a clean environment is so crucial. “The location of these vessels needs to be tightly controlled for light, relative humidity, temperature and cleanliness.” In the culture, sugar is a main ingredient in the medium, because the growing explants are not very photosynthetically active. “By opening the lid of the vessel, carbon dioxide is introduced to the environment, which promotes and enhances photosynthesis, really getting the plants ready for cultivation.”
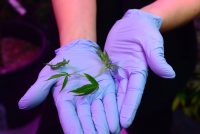
The very final step in tissue culture micropropagation is hardening, which involves the formation of the waxy cuticle on the leaves of the plant, according to Dr. Jones. This is what preps the plant to actually survive in an unsterile environment. “The rooted plants are removed from the culture vessel, the media washed off and placed in a potting mix/matrix or plug and kept in high humidity and low light,” says Dr. Jones. “Now that there is no sugar, contamination is no longer a threat, and these plants can be moved to the grow facility.” She says conditioning these plants can take one or two weeks. Over that time, growers should gradually increase light intensity and bring down the relative humidity to normal growing conditions.
Overall, this process, if done efficiently, can take roughly eleven weeks from prepping the explants to acclimation and hardening. If growers perform all the steps correctly and with extra care to reduce risks of contamination, one can produce thousands of plants in a matter of weeks.
In the fourth and final part of this series, we are going to dive into implementation. In that piece, we will discuss design principles for tissue culture facilities, equipment and instrumentation and some real-world case studies of tissue culture micropropagation.














 Each lab has access to raw, anonymized data including a consensus mean, z-scores and kernel density plots. This round measured how well 35 cannabis labs perform in testing for potency, pesticides, residual solvents and microbial contaminants such as E. coli, Salmonella, Coliform, yeast and mold.


